


Hoppity hoppity, Easter is on its way! One tradition our children look forward to is making and decorating our Easter Bunny Cake. My grandmother made this cake with my mom and her siblings, my mom with me and my siblings, and now I make it with my children. It is really easy, gets kids so excited to participate, and it is a sweet tradition.
Full disclosure: I am not a professional baker by any means, but I do want to make fun memories with our children, so here is our tutorial on how to make an Easter Bunny Cake with children.
 Ingredients and Materials:
- 2 round cake pans and cooling racks
- Cake mix or cake recipe ingredients
- Icing: store-bought or homemade (we make ours with 1 stick of room temperature cream cheese, 1 tablespoon of vanilla, and 1 lb. of confectioners sugar stirred in in small batches)
- Decorations like jelly beans, sprinkles, marshmallows, licorice, coconut shavings, etc.
- Food coloring dye
- Large tray or flat cardboard wrapped in foil for the cake
Make and Decorate a Homemade Easter Bunny Cake Instructions:
- Bake a cake using two round baking pans. Sometimes we get fancy and make a homemade cake like this or this, but we have totally also just purchased a box from the store. However, you choose to make a cake is great! Be sure to let the children help pour, stir, and maybe even crack some eggs. Even if they help just a few seconds here and there, they are participating which is valuable. Children love to be able to say that they helped make the cake!
- After the cake has baked, let it cool on baking racks. If we plan to decorate and eat the Easter Bunny Cake on Easter Day, then we typically make the cake the day before. We put saran wrap over it and leave it on the counter. Baking on an actual holiday when the kitchen is already bustling can get a little harried, so we like to bake a few things ahead.
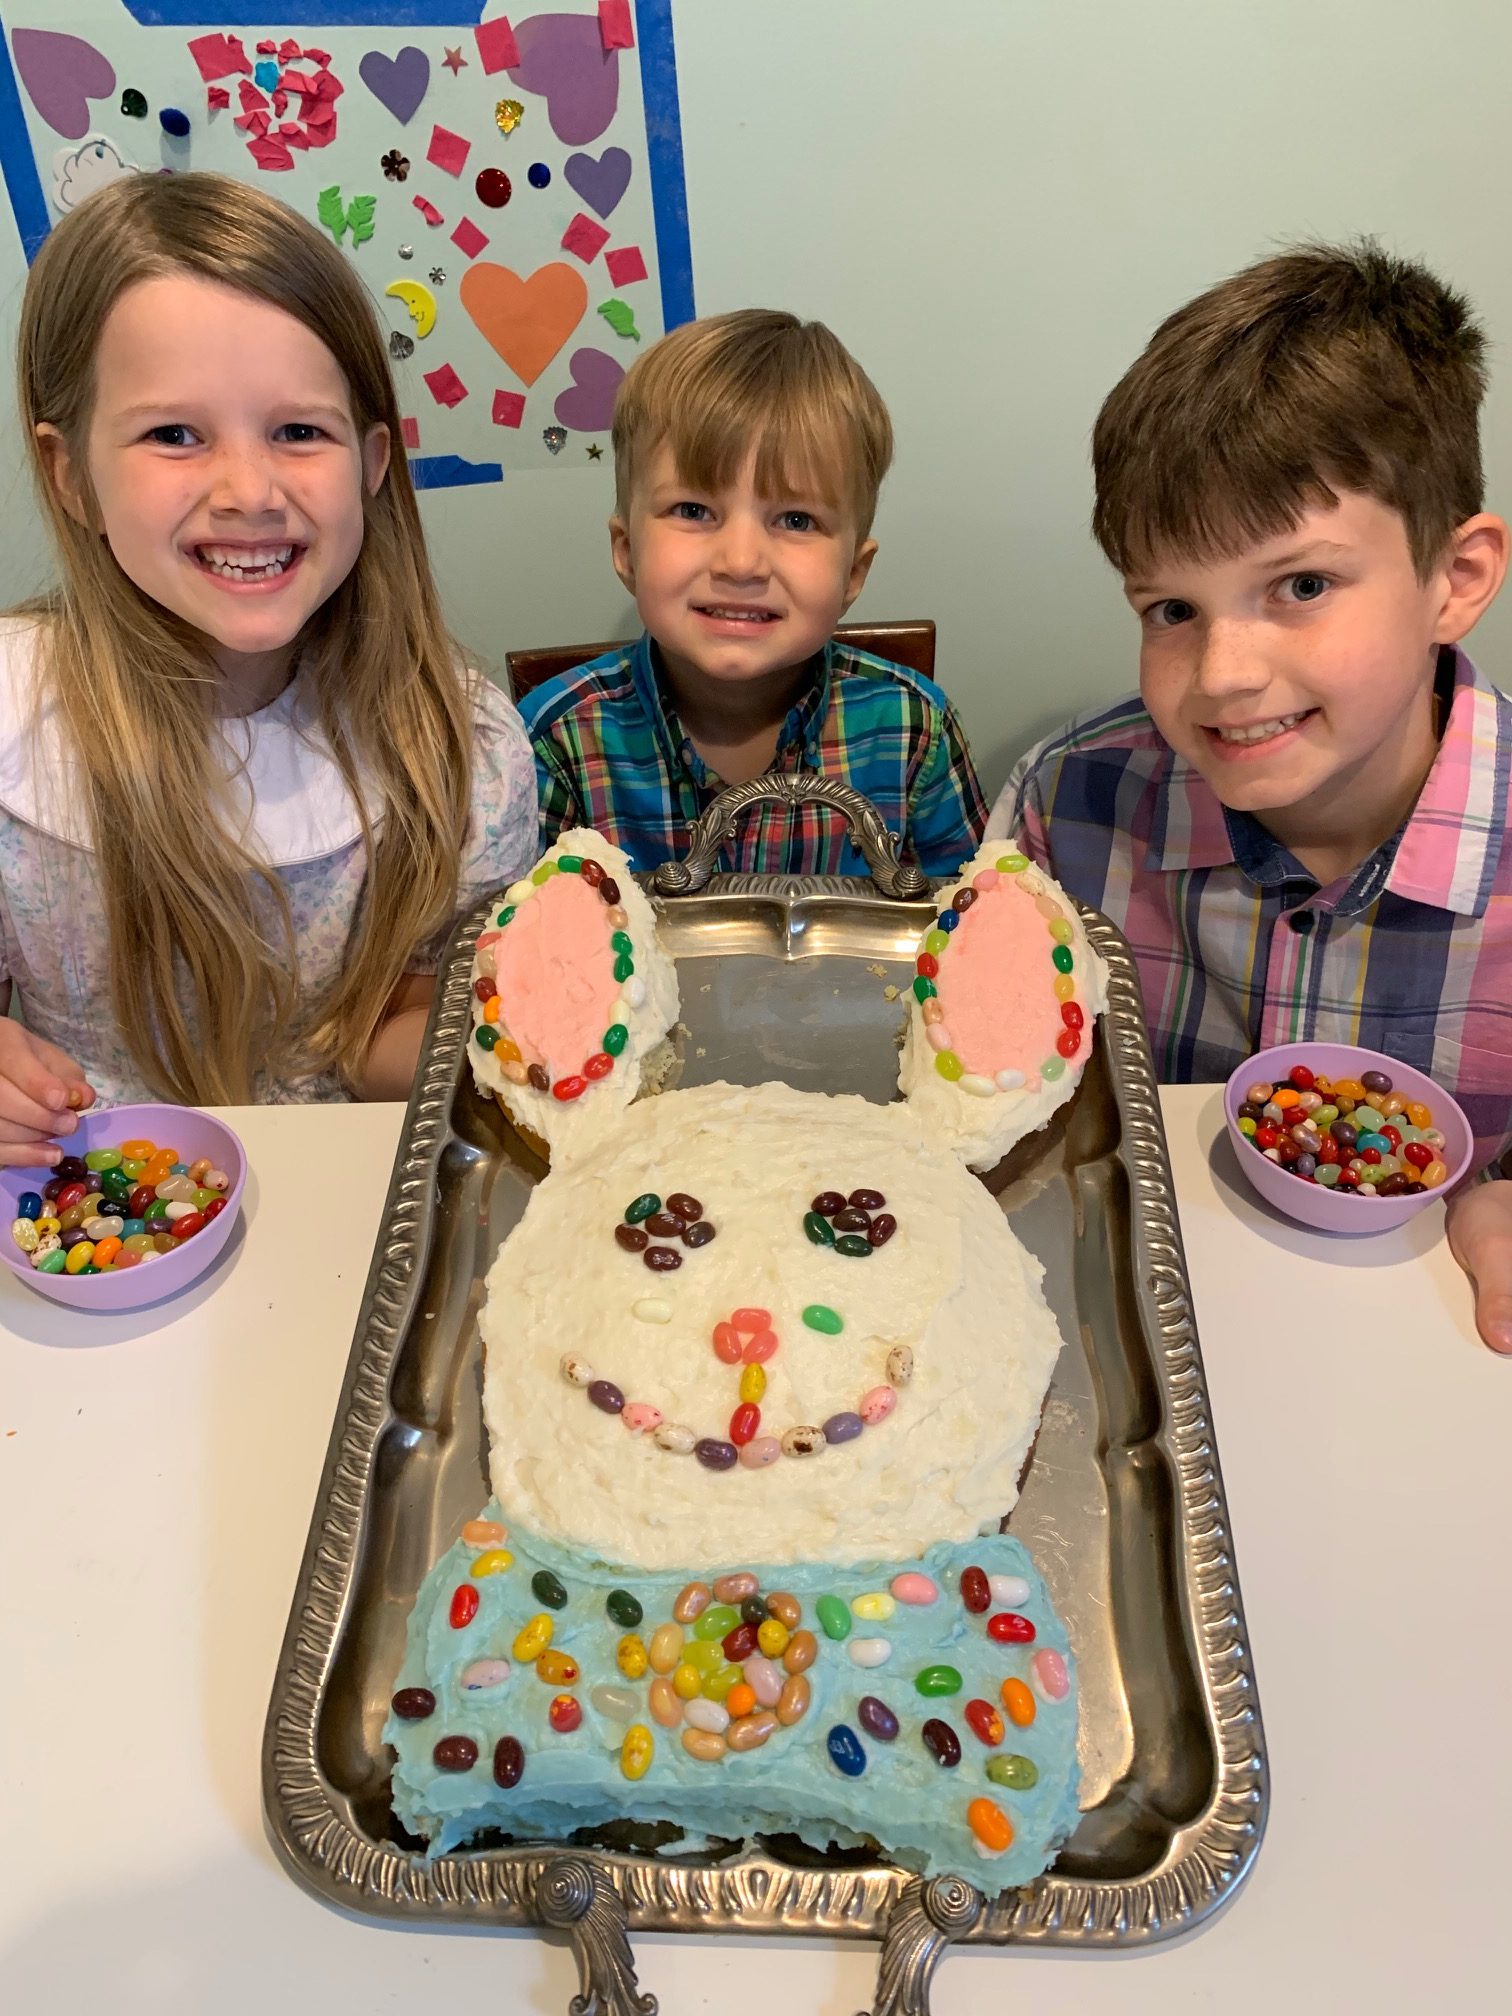
- Ok, now on to the fun! Once the cake is baked and cooled to room temp, it’s time to decorate. Place one round cake a little lower than the center of the tray. Next, cut two bunny ears off of the second round cake which should look like two oblong pointy ovals. Honestly, I eyeball cutting the ears, but try to keep the ears and center of the cake pretty even in size. The area between the two ears will be the bowtie!


- Place the bunny ears above the round cake on the tray, then place the bowtie below the round cake. Then voila, you have a bunny! Sometimes the bowtie needs a little trimming to fit just right. That’s OK! Again, we are not professional bakers, but simply trying to make a fun memory with our children.
- Once the Easter Bunny Cake is in place, ice the cake. Your bunny can be whatever color you like. In this example, we chose a white bunny. Ice the cake, but leave some icing to the side to dye the ears and bowtie. When icing a cake, I like to start with the lighter color first, so the darker color doesn’t bleed onto it.
- Dye the icing for the ears and bowtie. We like to start off with a few drops of dye in each container. This is a fun experiment for children to see how far food dye really goes. Of course, you can also naturally dye icing with foods like strawberries or blackberries.
- After you have found the perfect shades, place a smaller oval inside the ear to portray bunny ears. Then cover the bowtie with icing. Children love smearing icing on. It isn’t always neat and it can get frustrating if they puncture the cake, but this is a great way to show resilience and to make the best out of a fun time!


- After the Easter Bunny Cake is fully iced, it’s time to start doing the detailed decorating with jellybeans, marshmallows, sprinkles, etc. I like to place the decor items in separate containers for children so they know they have a certain amount they are in charge of. And let the kids have at it! I gently help here and there, but overall, they get to decorate it.
- Here are some specific ideas with how to decorate the Easter Bunny Cake:
- coconut shavings to make the Easter Bunny look like it has real fur
- licorice for the whiskers
- jelly beans for the eyes, nose, and mouth
- marshmallows around the ears
- sprinkles to add more color to places


Enjoy this time baking and designing an Easter Bunny Cake with children during this fun season. It really is fun and they will ask for it again the next year. I know I did and my kids ask now too! Share your pictures on social media and be sure to tag us at @dcmoms!


