


Are you looking for a fun and creative way to get your kids into the holiday spirit? Look no further! With just a few simple steps, your kids will create a cute and festive Santa Handprint Craft!
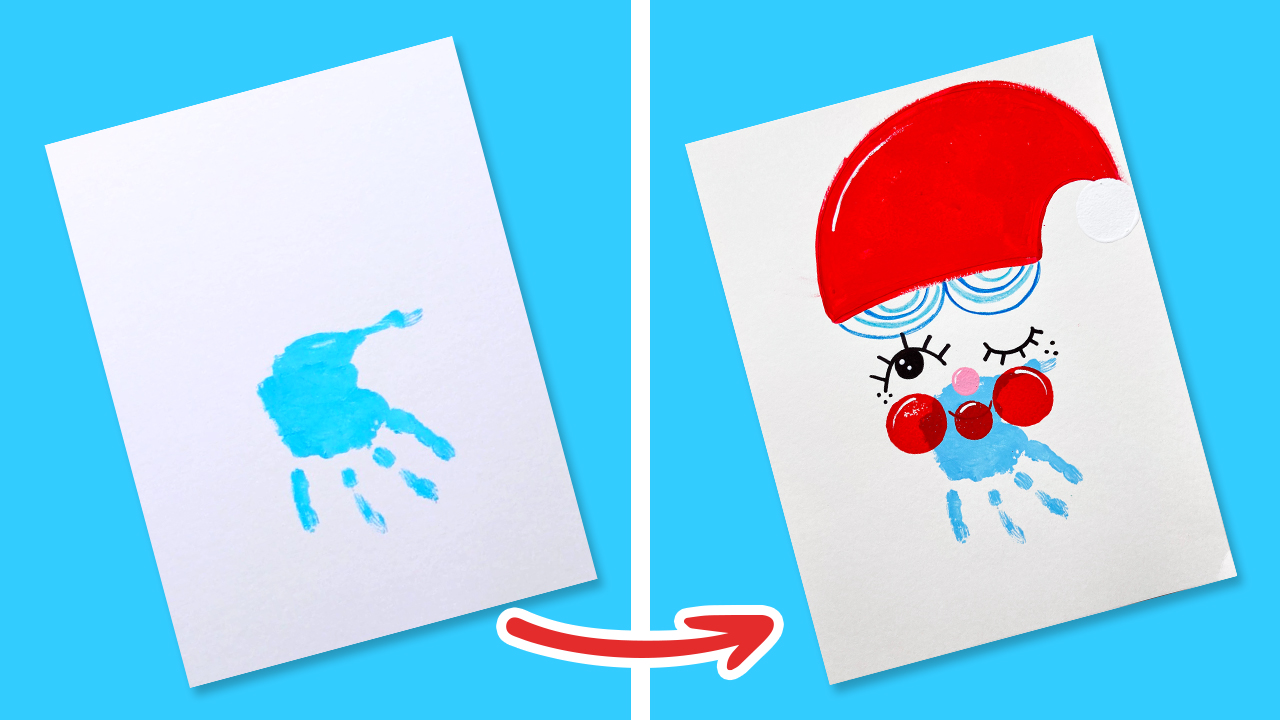
This fun and easy Santa art is the perfect project to get your kids excited about the holidays. They get to transform their handprint into a Santa Craft!
Supply List for Santa Handprint Craft:
Step 1: Paint the Fun On
Gather a non-toxic blue paint, a foam brush, a palette, and a piece of paper. Squeeze a little bit of blue color onto the palette of your choice and let your kid’s hand become their canvas. If they are big enough, let them try to paint their own hands!
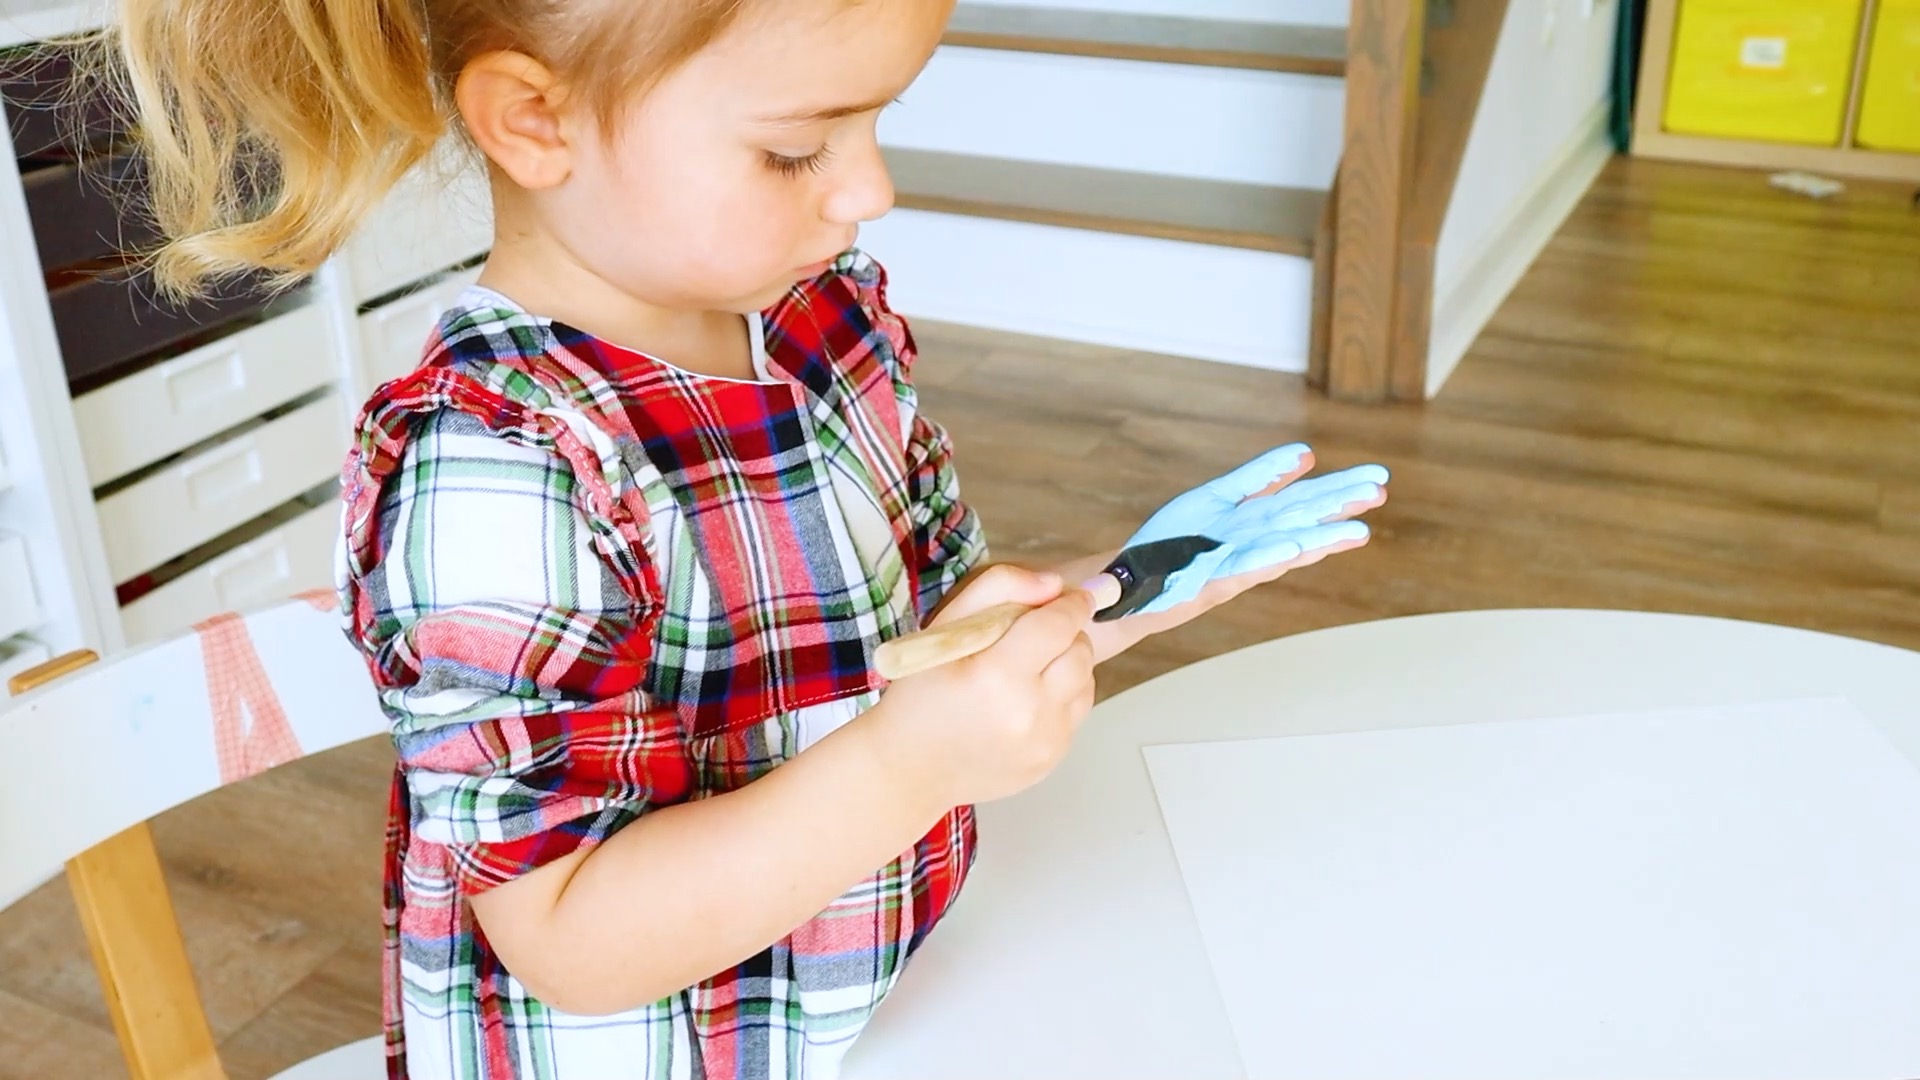
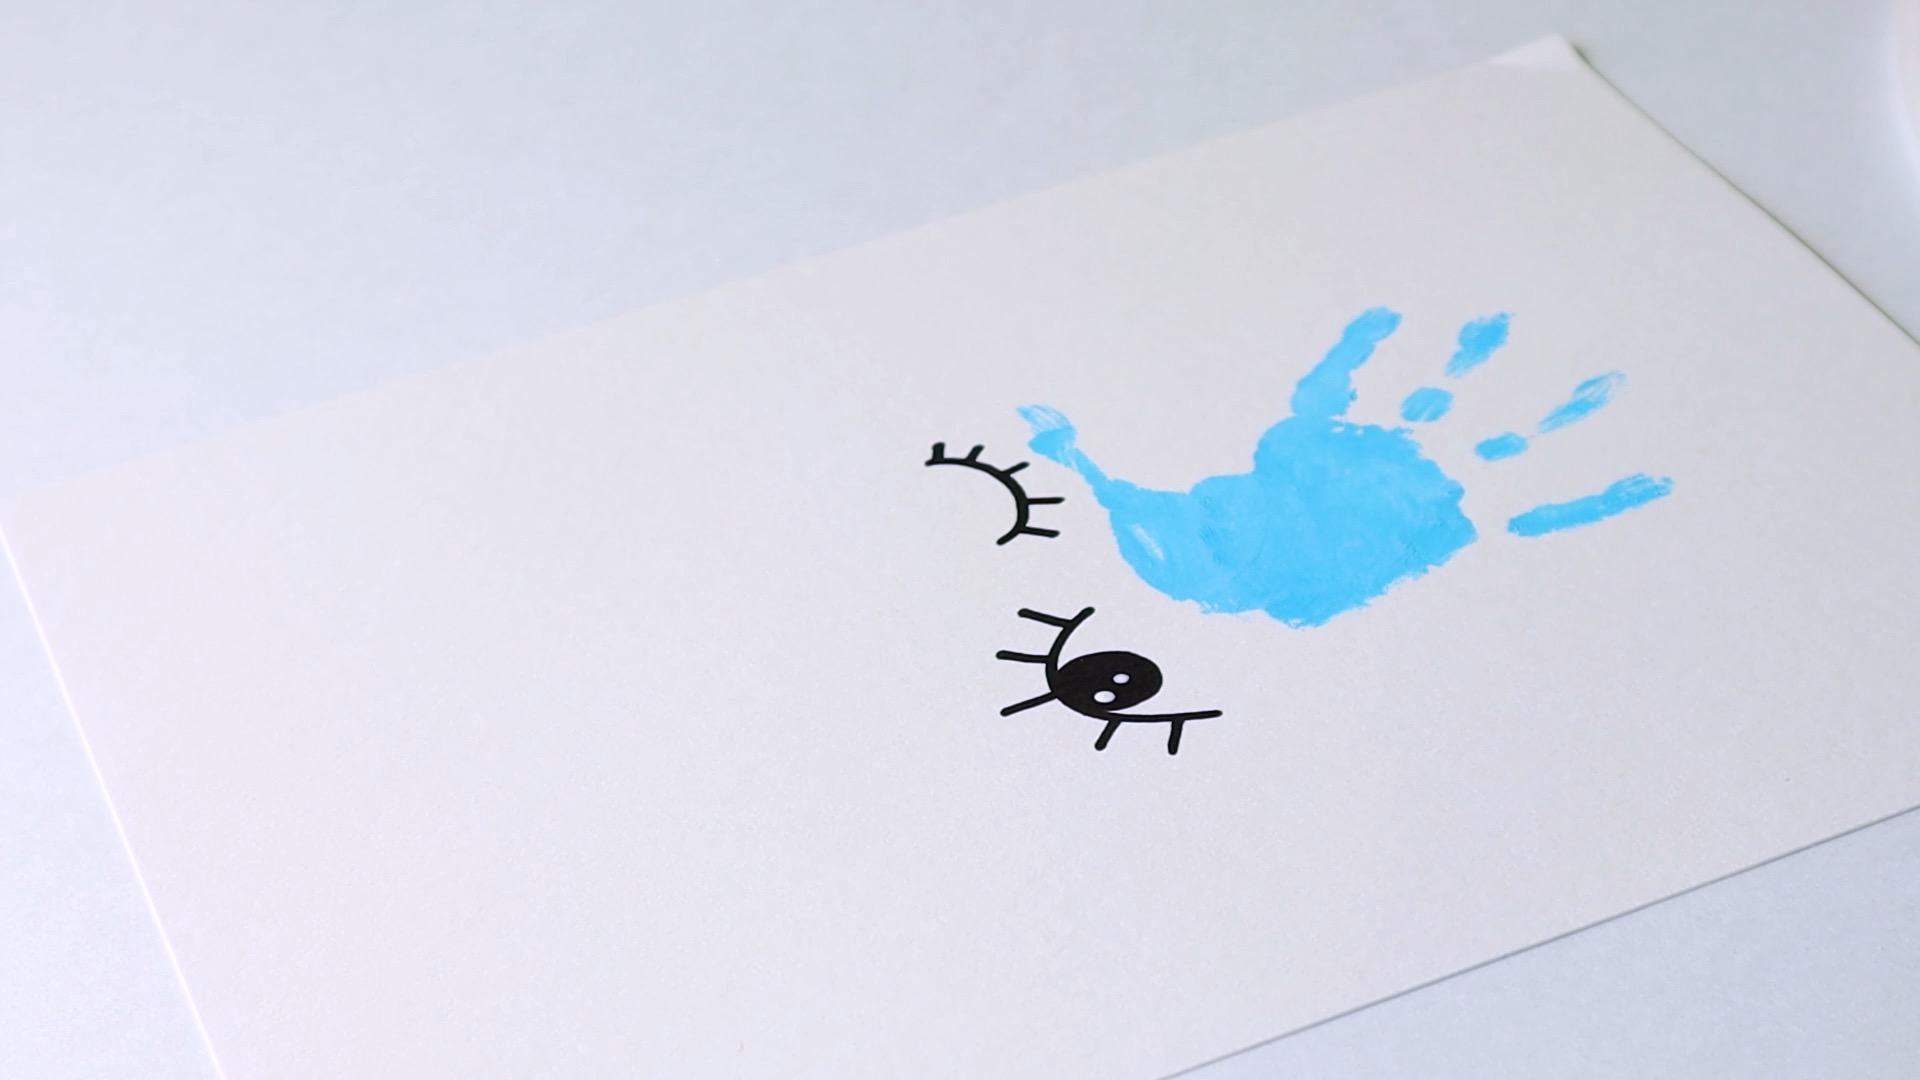
Ready to make the mark? Ask your child to spread the fingers wide, then press their fingers and palms firmly onto the paper, as their hands will make an impression that will last!
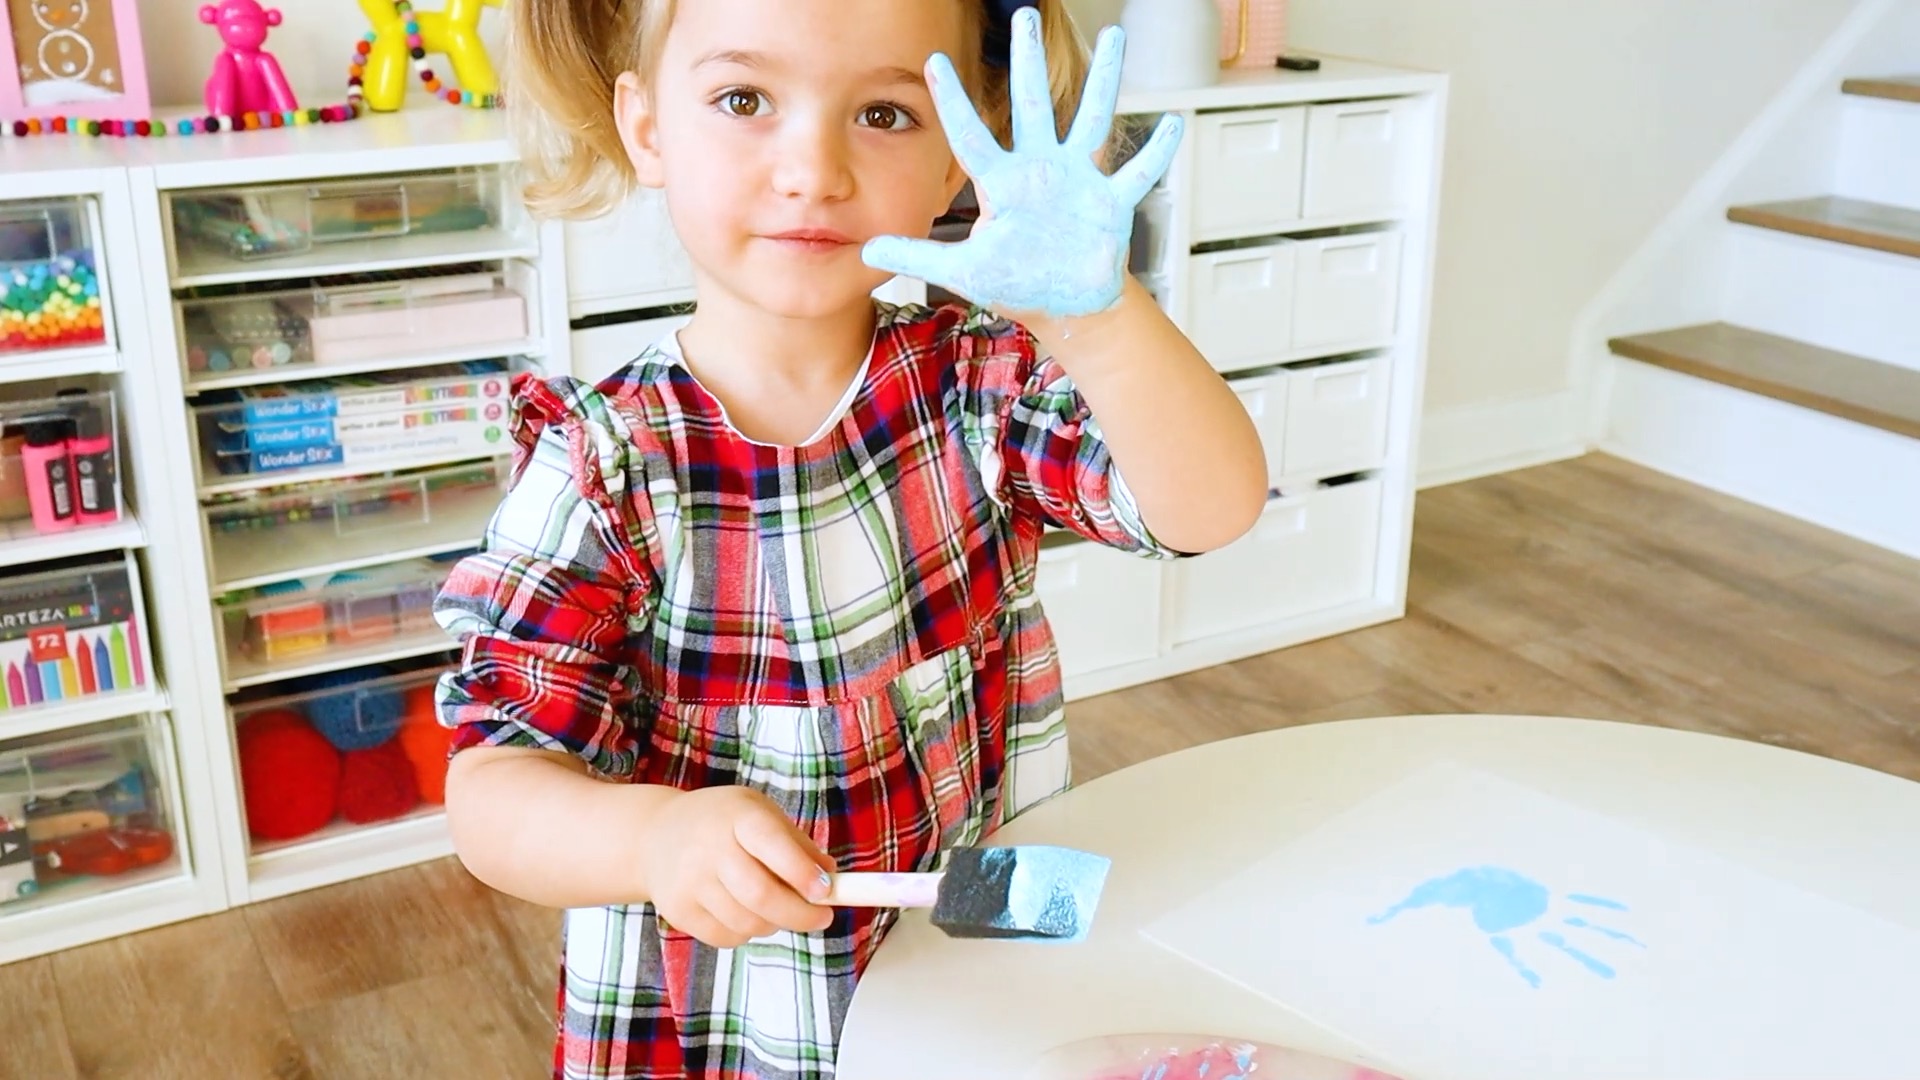
Once you make the handprint, wash your kid’s hand immediately.
Step 2: The Art of Seeing: Drawing Stunning Eyes
Let’s get creative and draw some eyes! Grab your black permanent marker or any colored pencils, and let’s get started. Start by drawing a circle and color it black. Then, draw an arch and add a few eyelashes to complete the look.
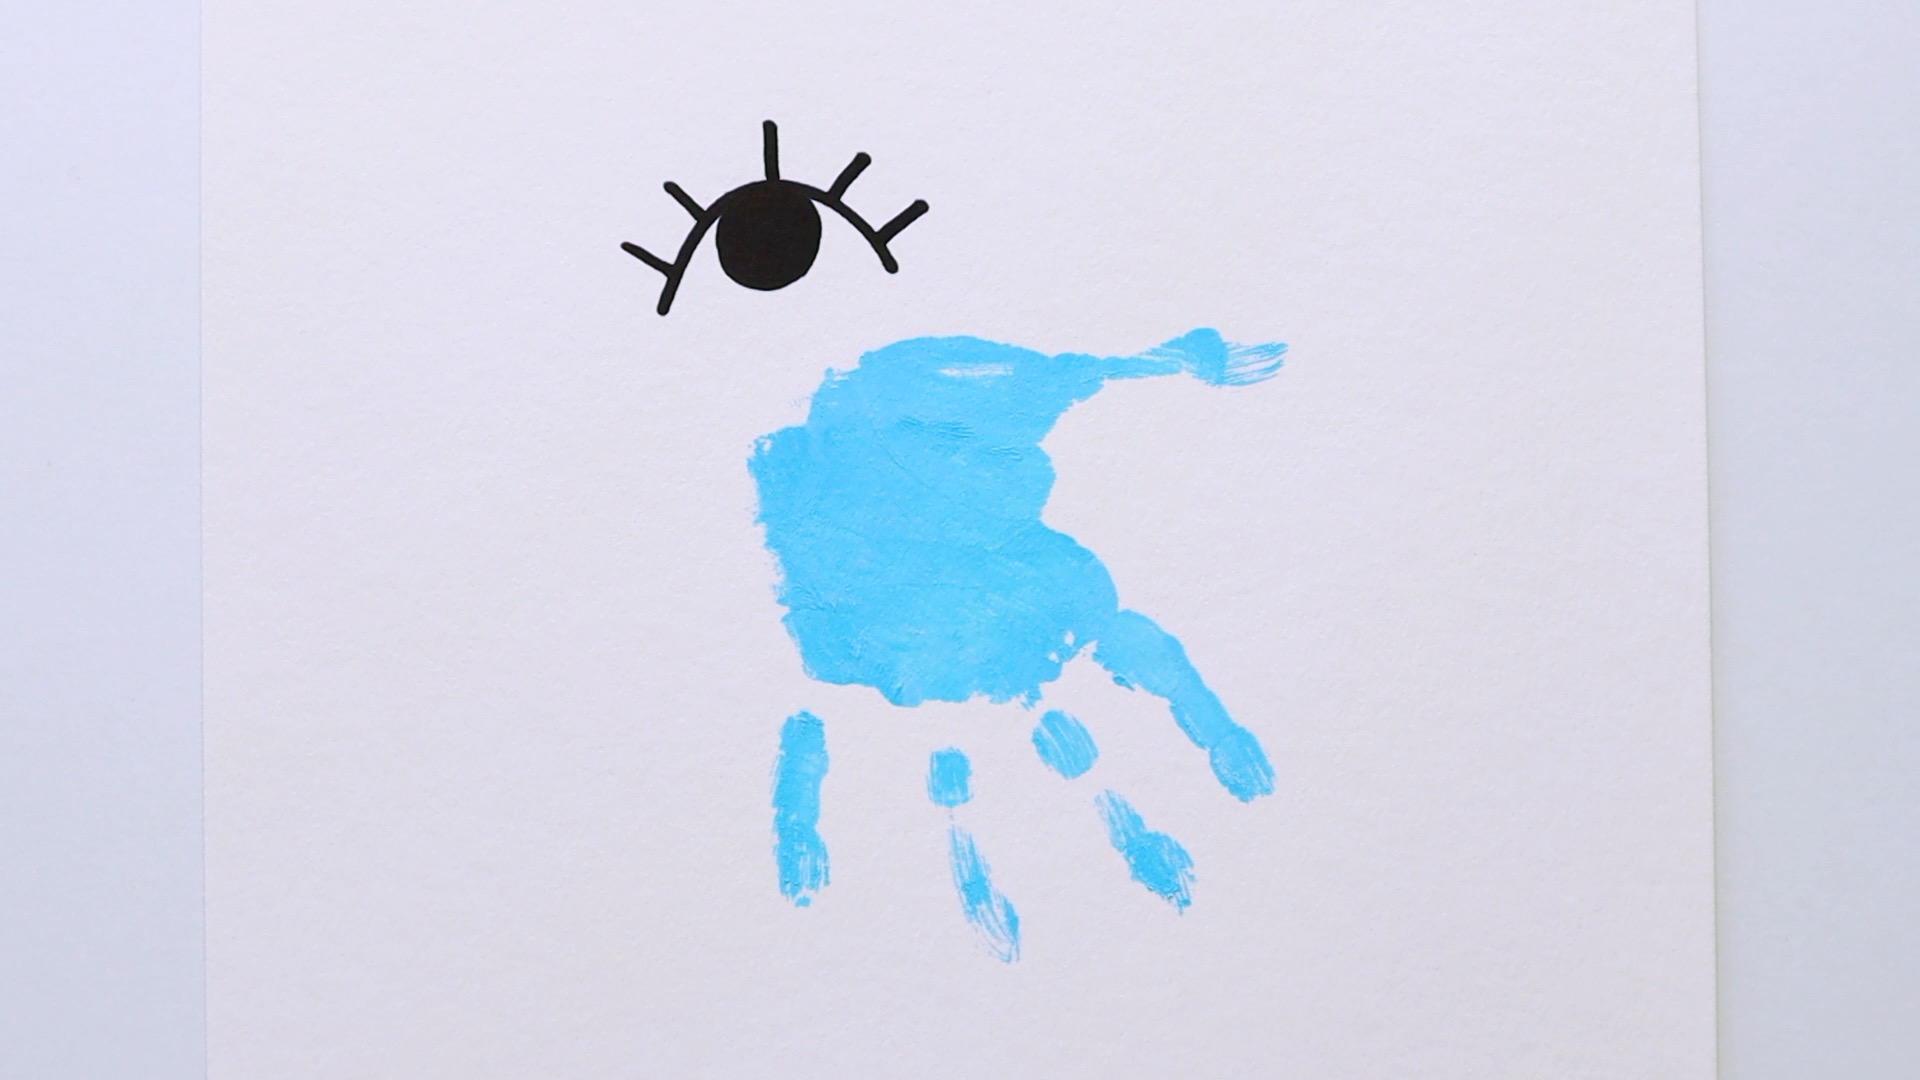
Drawing eyes can be tricky, but with this simple trick, you can have them done in no time! Draw a second arch line going the opposite way (so it is winking) and add the same amount of eyelashes as the other side.
Lastly, bring the look to life with two circles using white color on the pupil of the eye! Paint one larger and one smaller for a unique and eye-catching highlight.
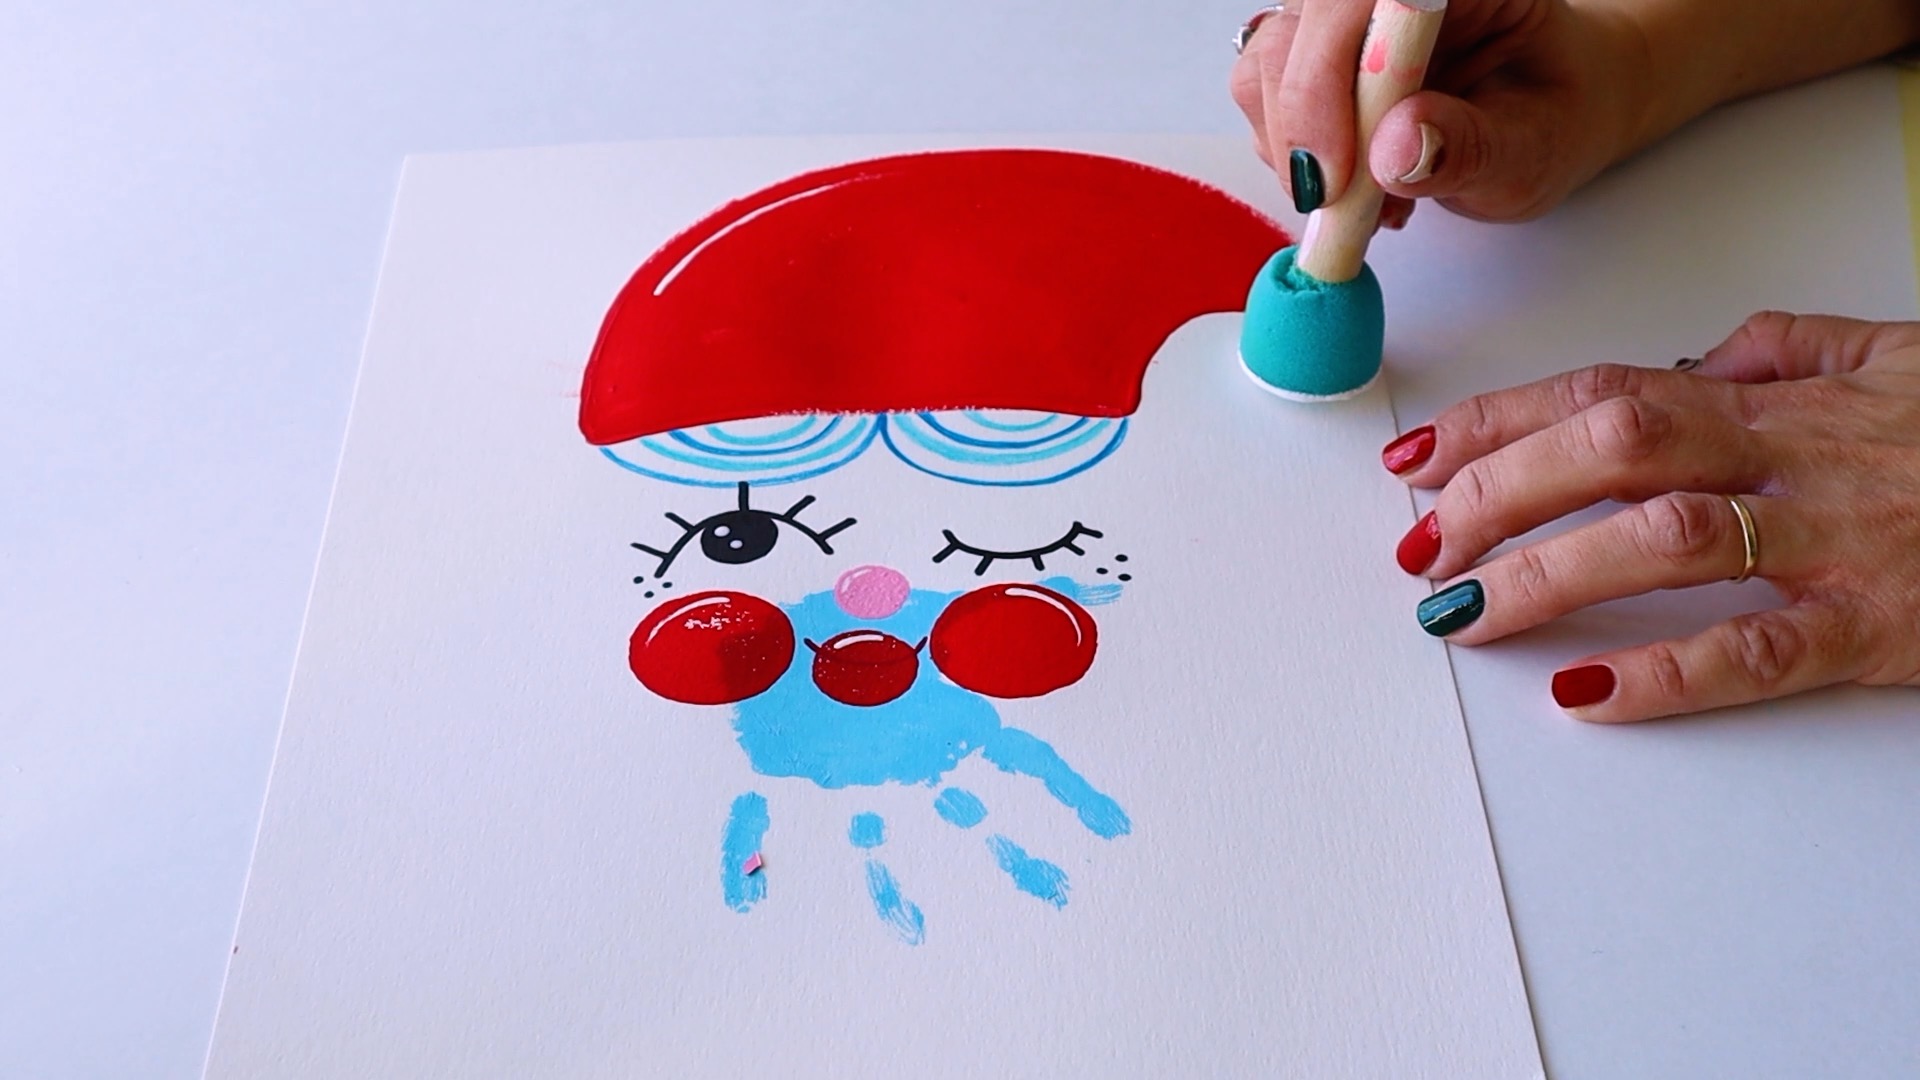
Step 3: Create Perfect Features with Sponge Brushes
If you have round sponge brushes at home, find them and get creative. If not, you can paint circles instead or use pom-poms and clothespins to make stamps!
Grab your tiny round sponge brush and dip it in the pink paint. Make one stamp for the perfect nose. Using your bigger sponge brush, dip it into the red paint and make two stamps for the cheeks.
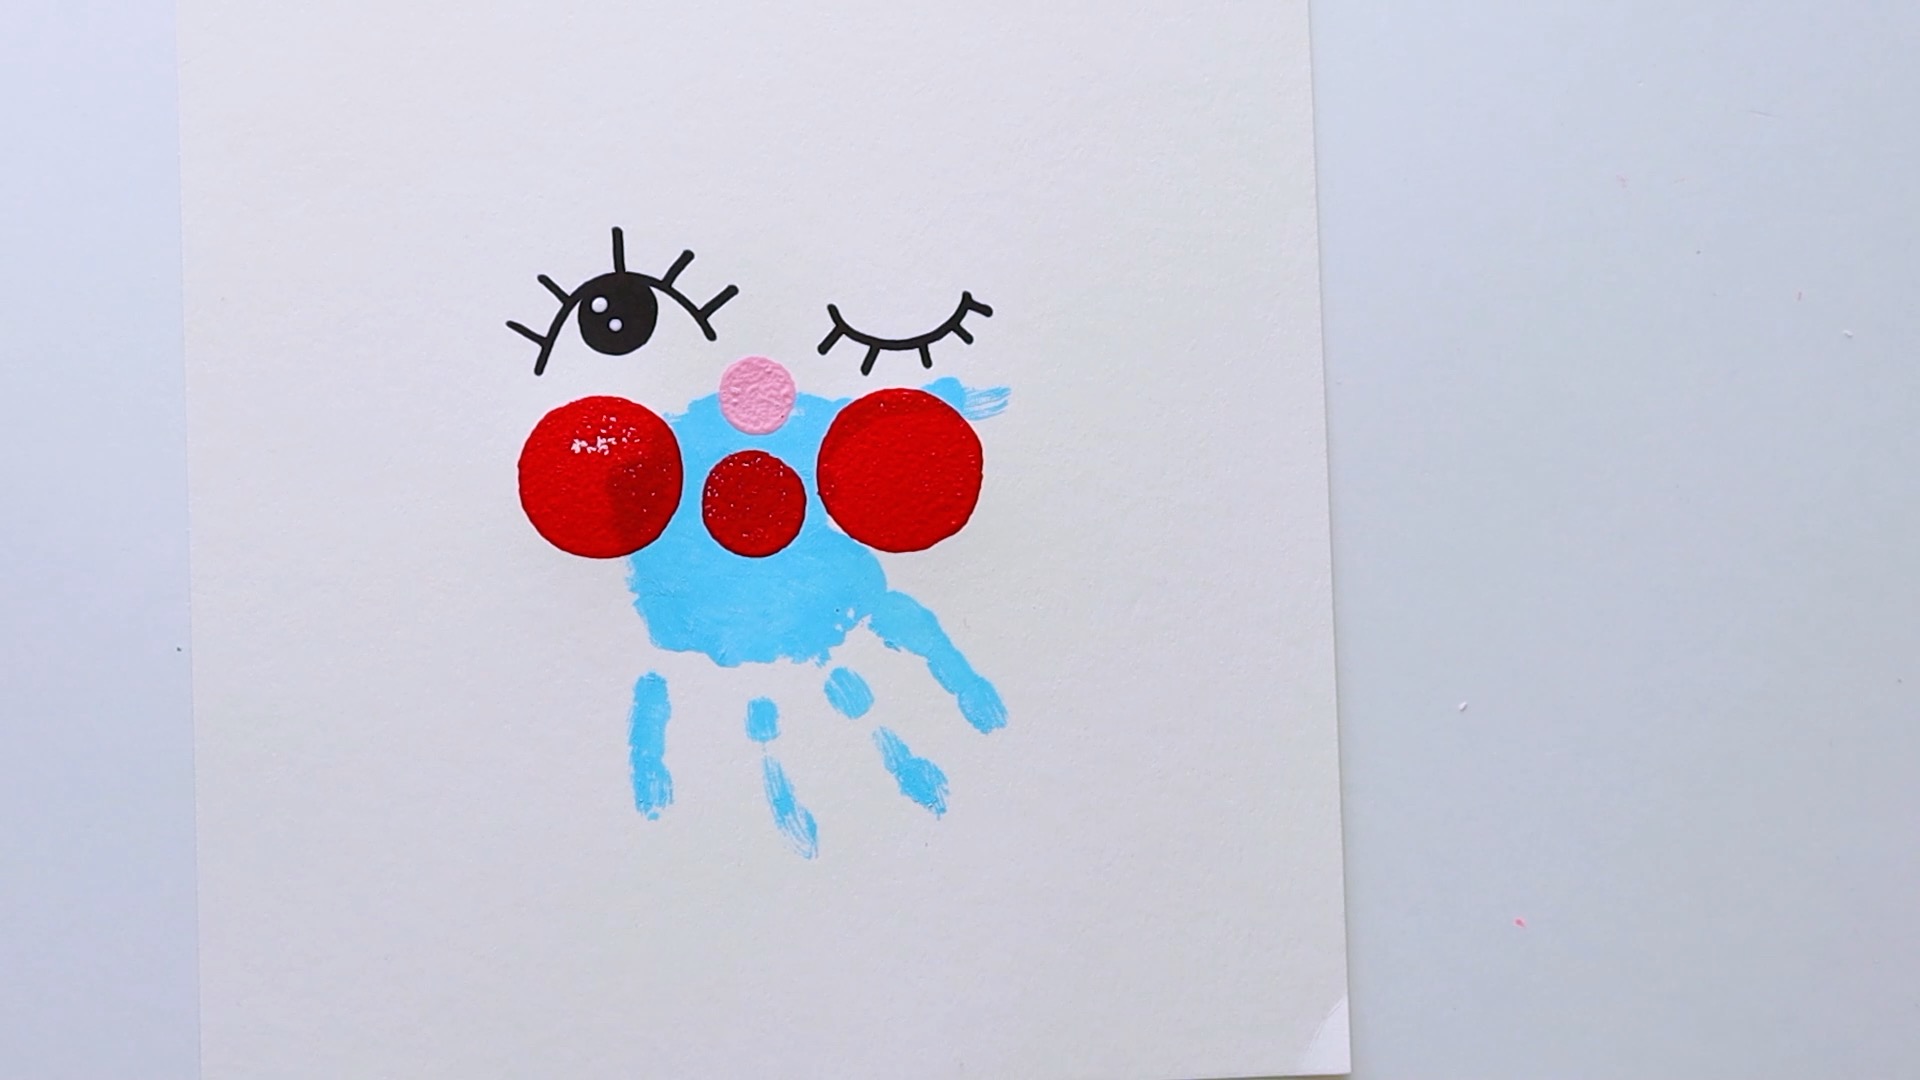
Use your medium size round sponge brush to paint the perfect mouth, then let all the circles dry for a flawless finish.
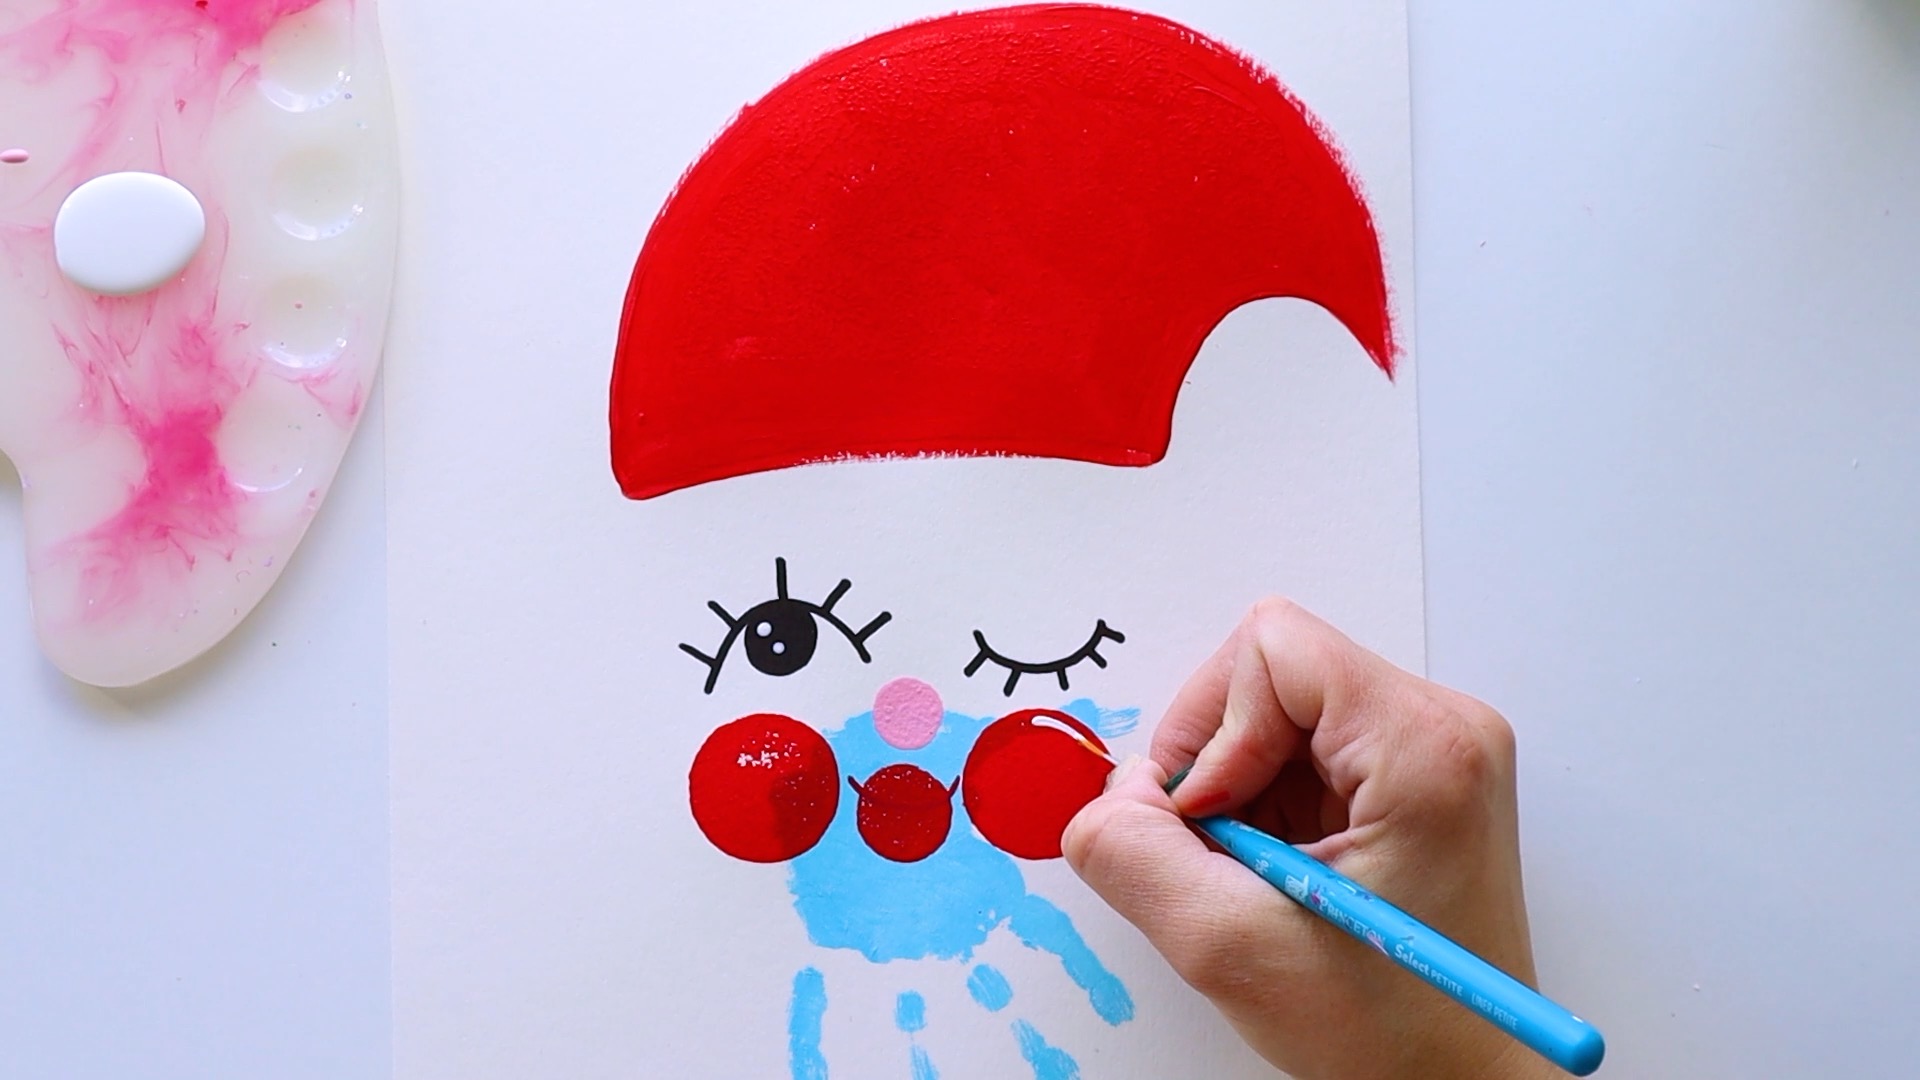
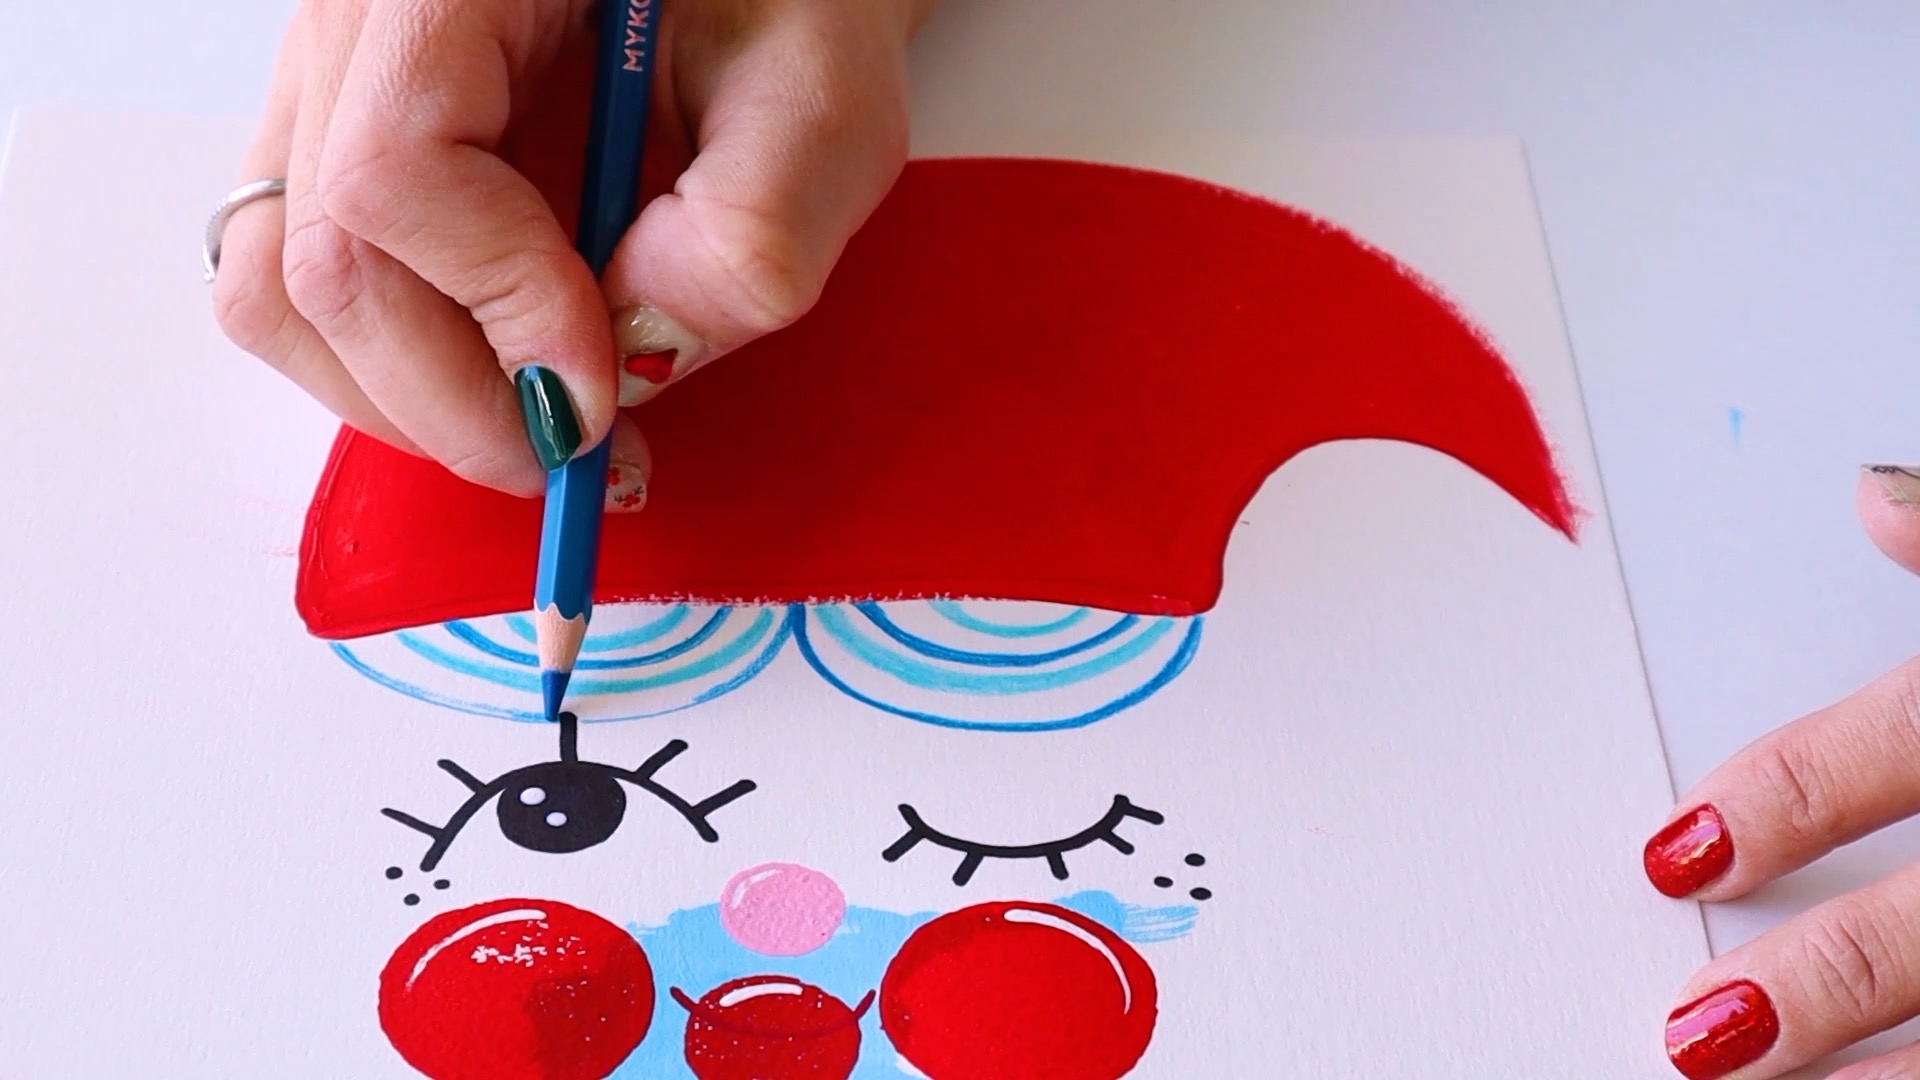
Step 4: Designing a Jolly Santa Hat
Above Santa’s eyes, draw a straight line. From the left side, draw a curved line to the right and one more curved line back! Paint it red.

While the Santa’s hat is drying, use your paintbrush and white paint to add highlights to the cheeks, nose, and mouth. Don’t forget to draw the letter U and give Santa a smile.
Step 5: Santa’s Fabulous Hair
Sketch a few arched lines with your colored pencils for the hair.
Step 6: The Little Things Make All the Difference
Give this Festive Handprint Santa’s Craft the perfect finishing touch! Squeeze a bit of white paint and make one last stamp with your sponge brush to complete Santa’s hat.
Ta-daaaaa, your Festive Santa HandPrint craft is complete!
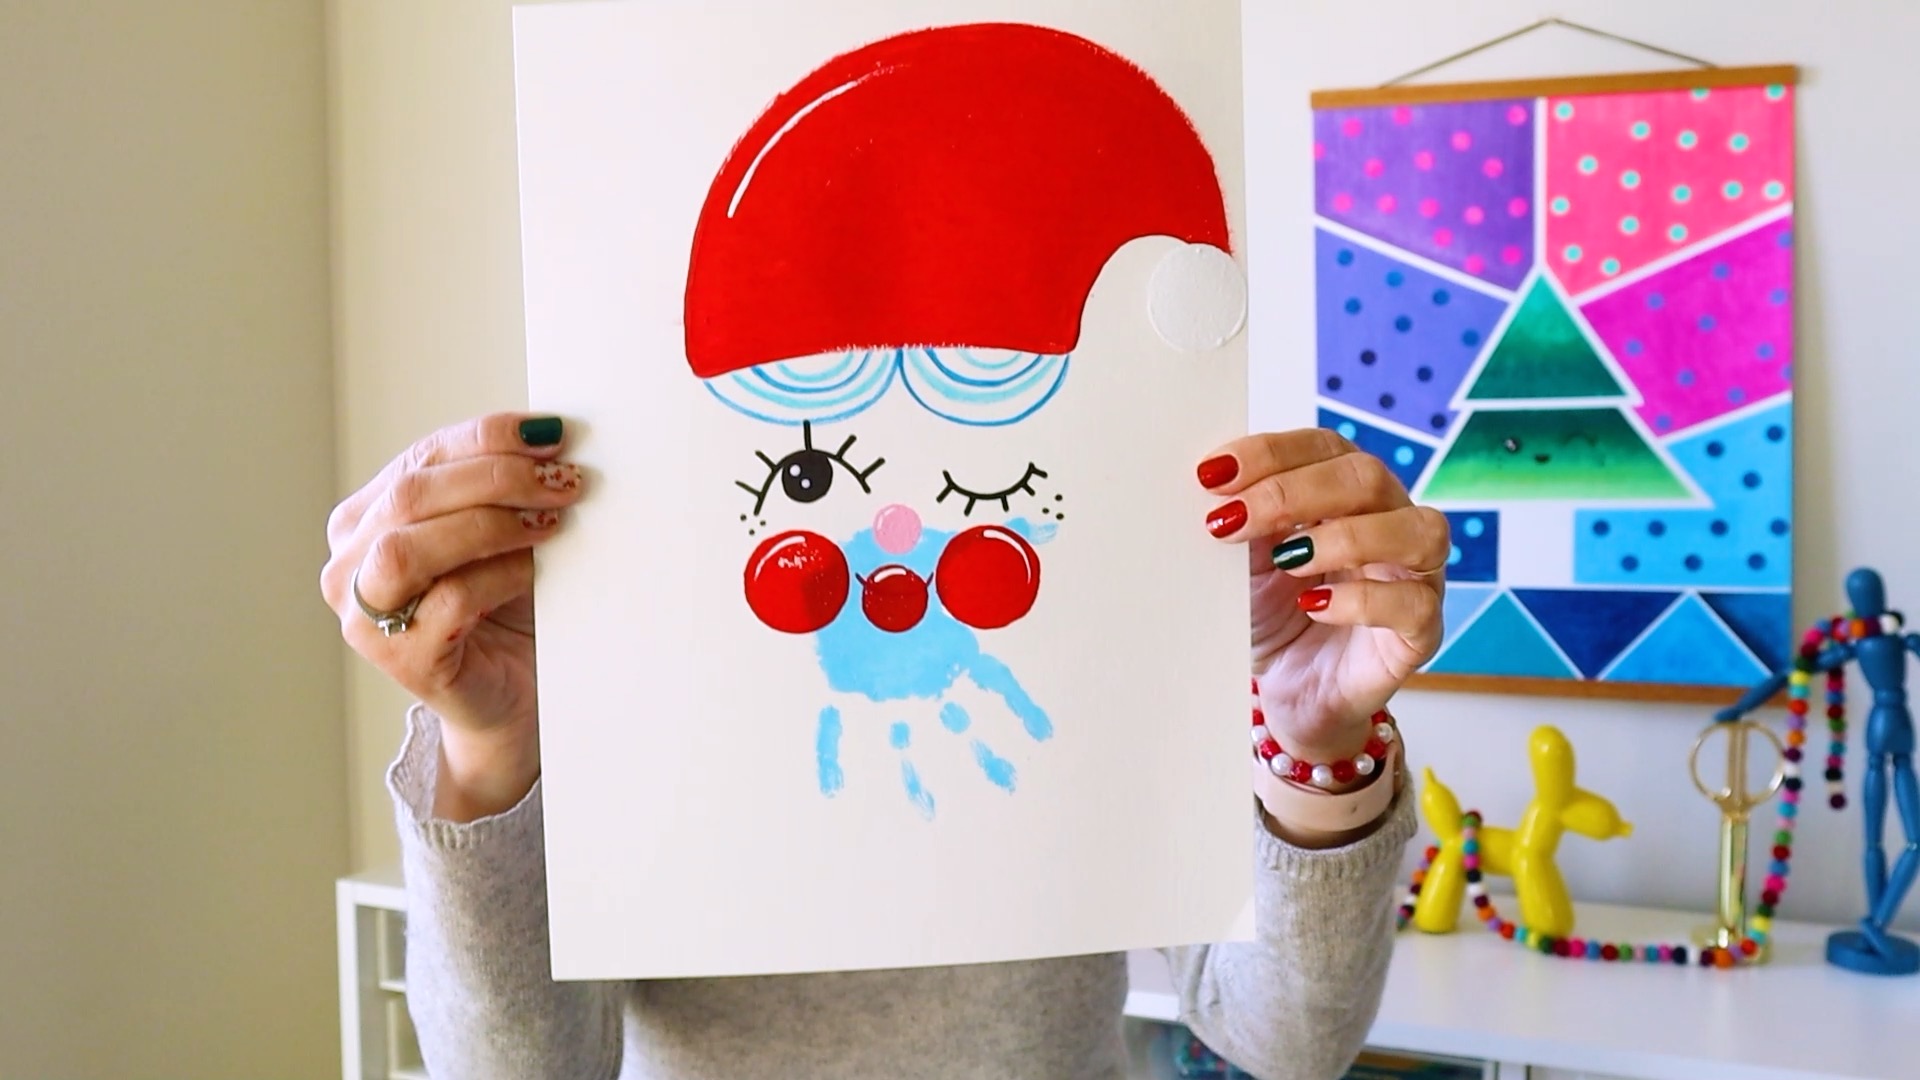
You’ve created an adorable Santa Handprint Craft – now it’s time to show it off! Display your artwork or send it as a gift to your family and make them smile.
For a full video tutorial, visit Lulumake’s youtube channel and let us know what we shall create next!
Happy Crafting.
This article was originally published in 2022.


