


Turn your empty cereal box into an adorable Easter bunny! Add artificial or real flowers to create a blooming flower crown for your upcoming masterpiece! Invite your little artists to create this recycled Easter Bunny craft!
Find your art supplies- it’s CRAFT time o’clock!
Supply List:
- Bunny Template
- Cereal box or cardboard box
- pencil
- scissors
- Kids washable paint (we used white & pink)
- Paintbrush and palette
- Round foam sponge brush
- Black marker (we used black permanent marker)
- Artificial flowers
- Hot glue or Tacky glue
Step 1:
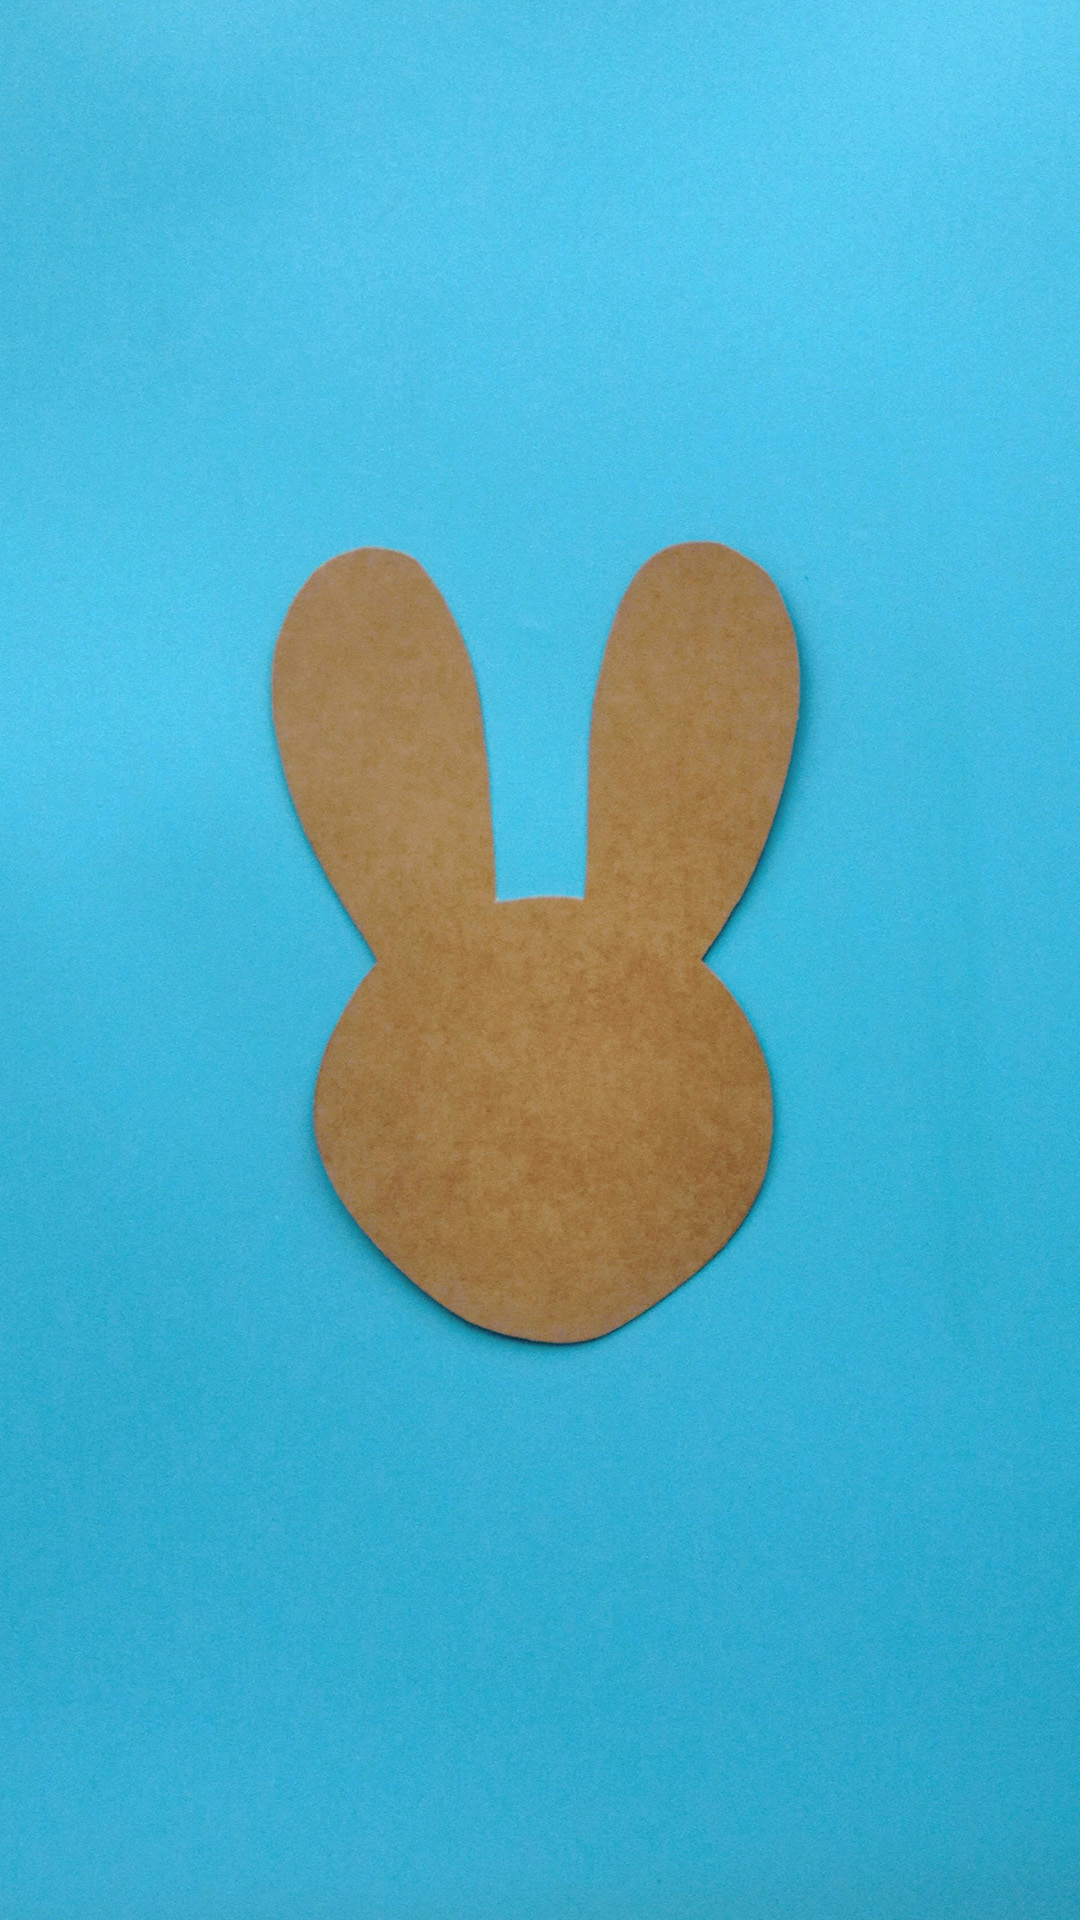
Print the bunny template, cut it out, and trace it onto the backside of an open cereal box or cardboard. Trace it with your pencil and cut it again. If your print is out of ink, you can always draw the bunny’s face onto the paper.
Step 2:
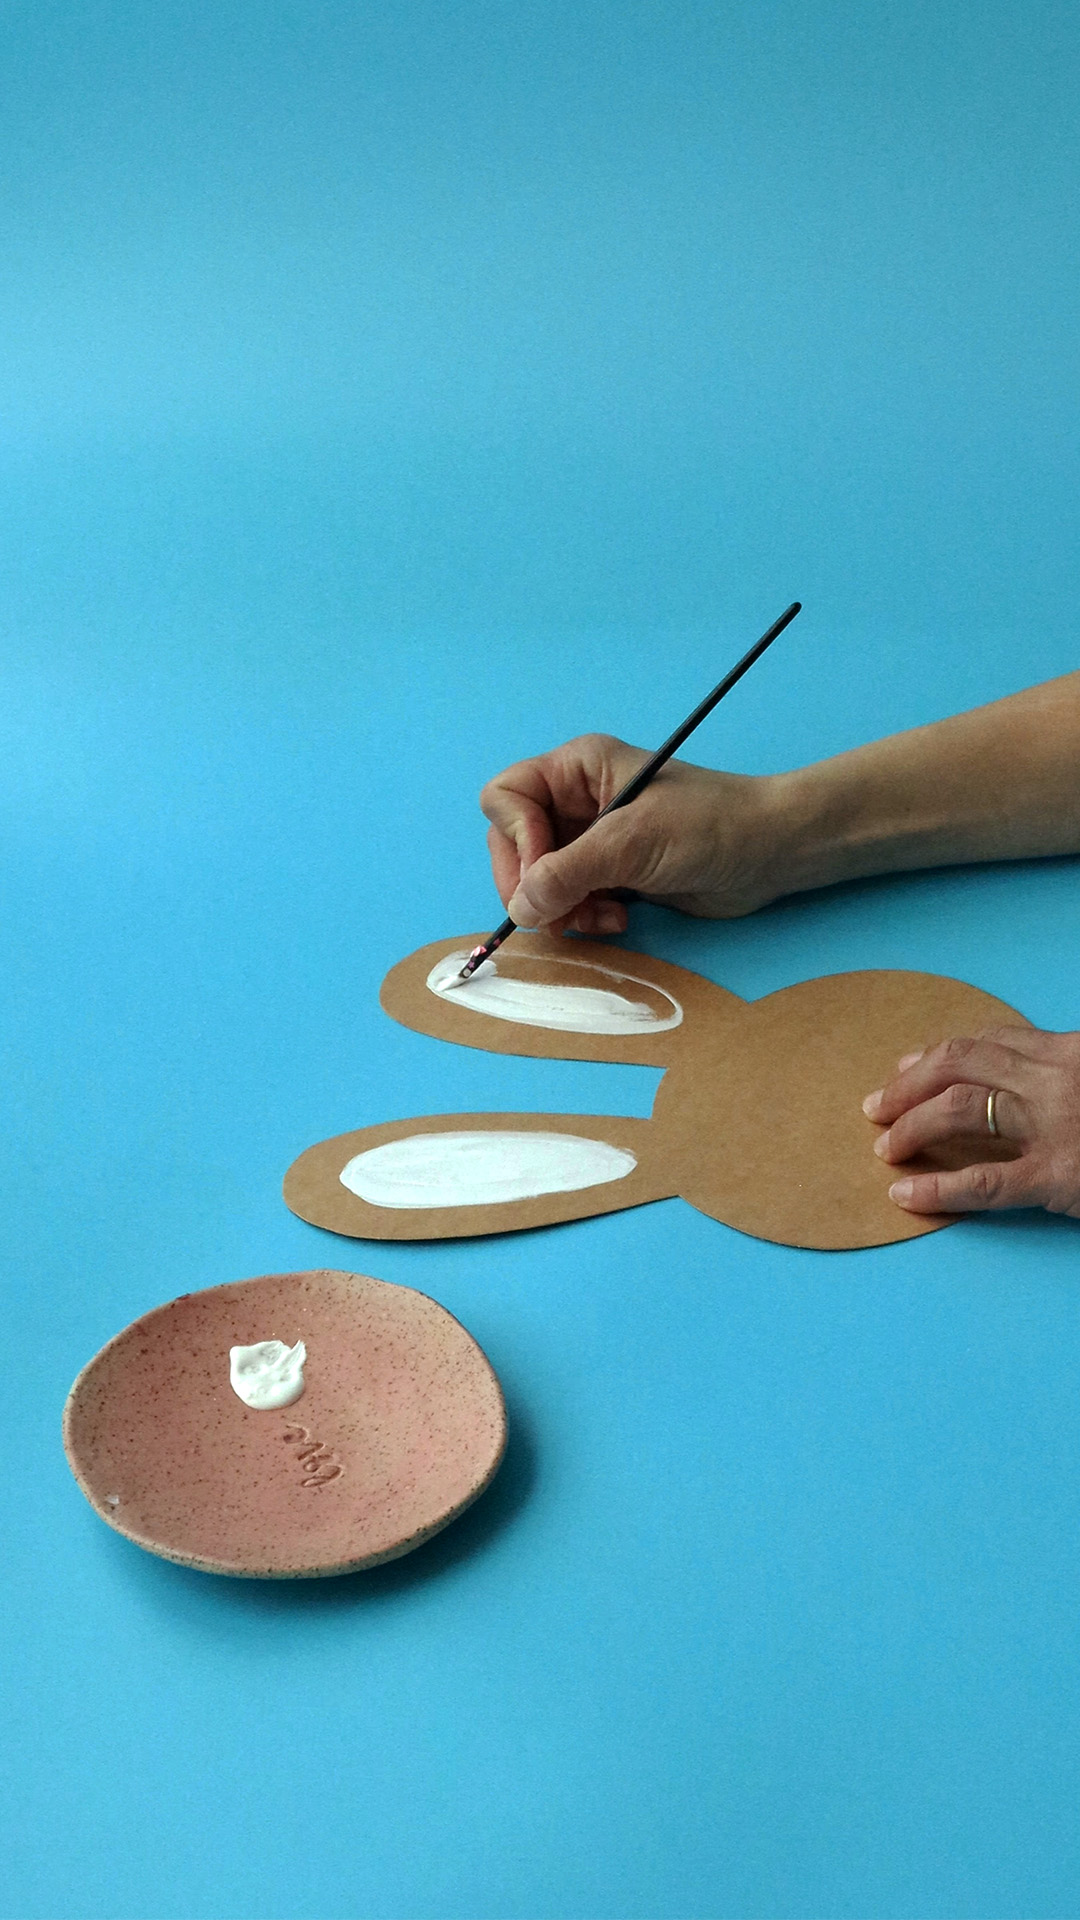
Squeeze white paint onto the palette or piece of paper. Dip your paint brush into the white paint and make one oval shape on each bunny’s ears. These will become the inner ears of your Easter bunny! Paint both oval shapes white and let them dry. If you prefer, you can first draw the inner ears with your pencil and then trace them with the white paint.
Step 3:
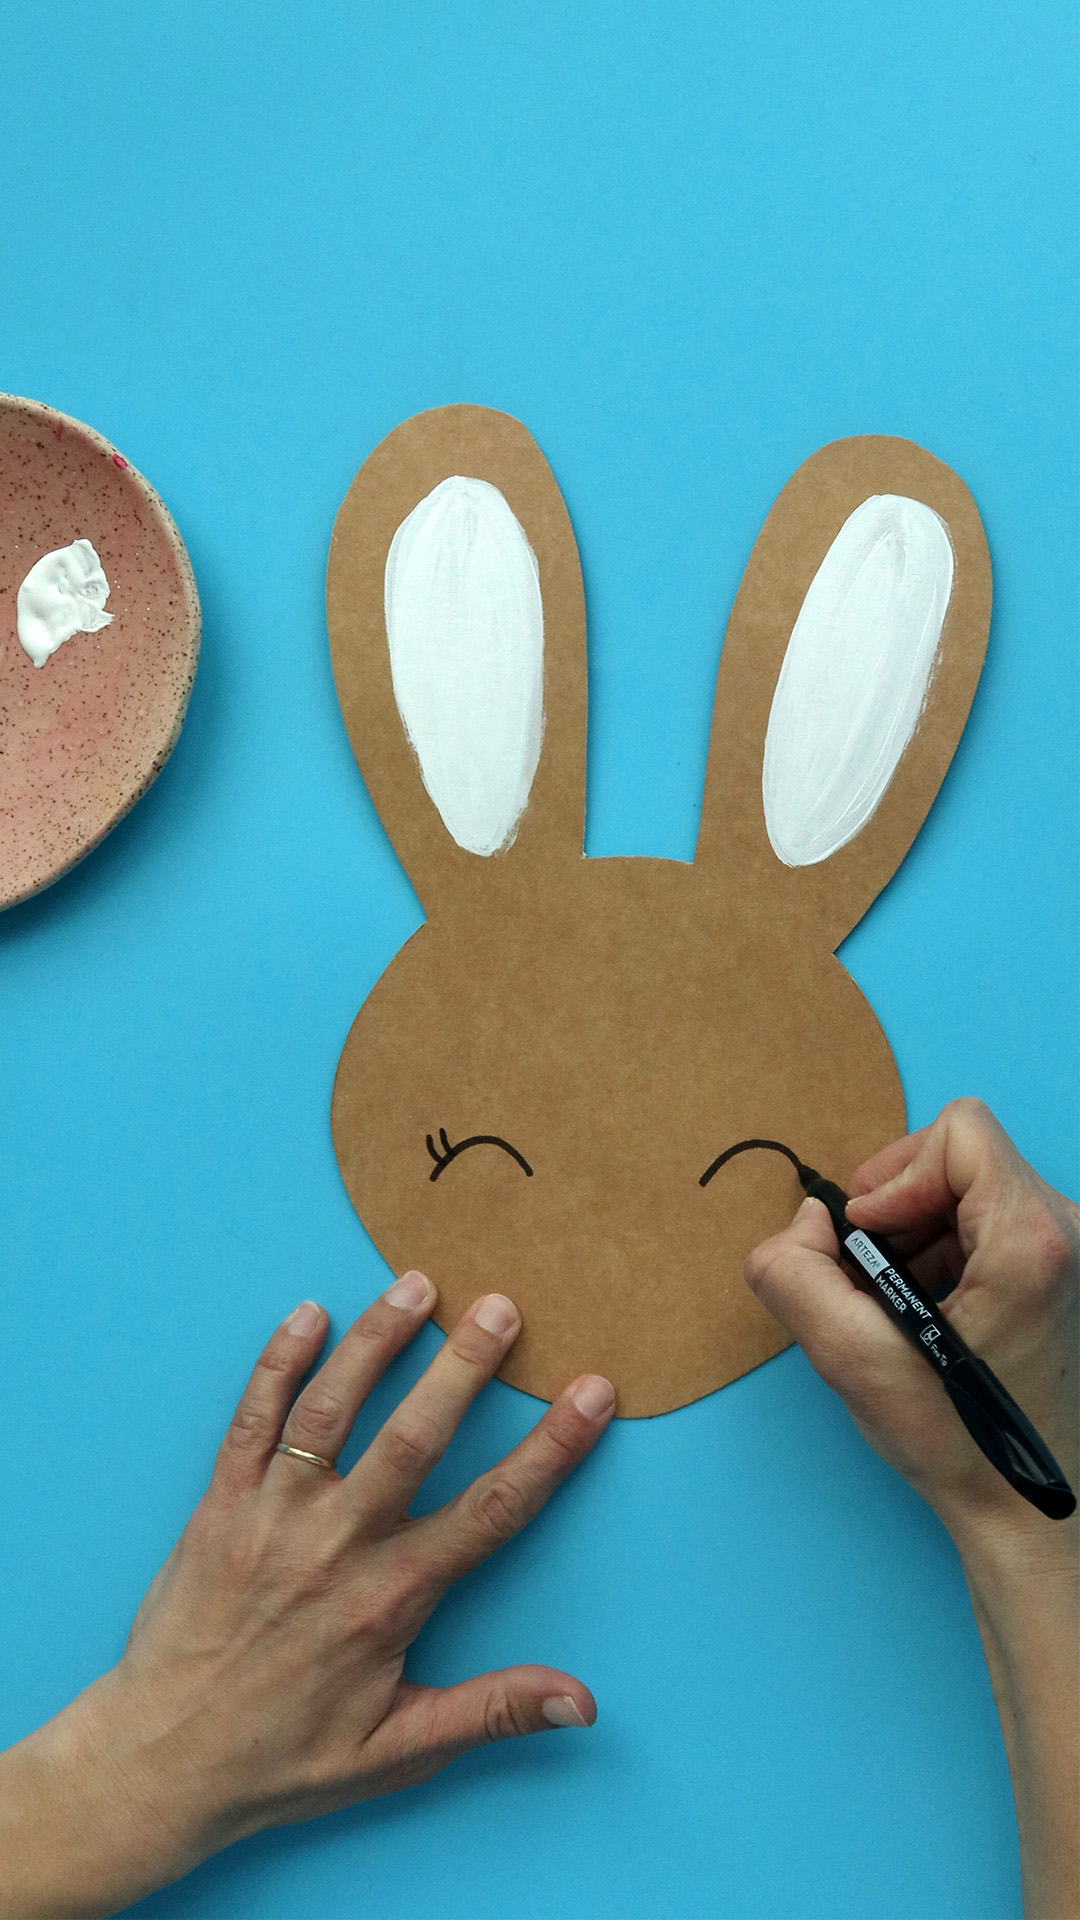
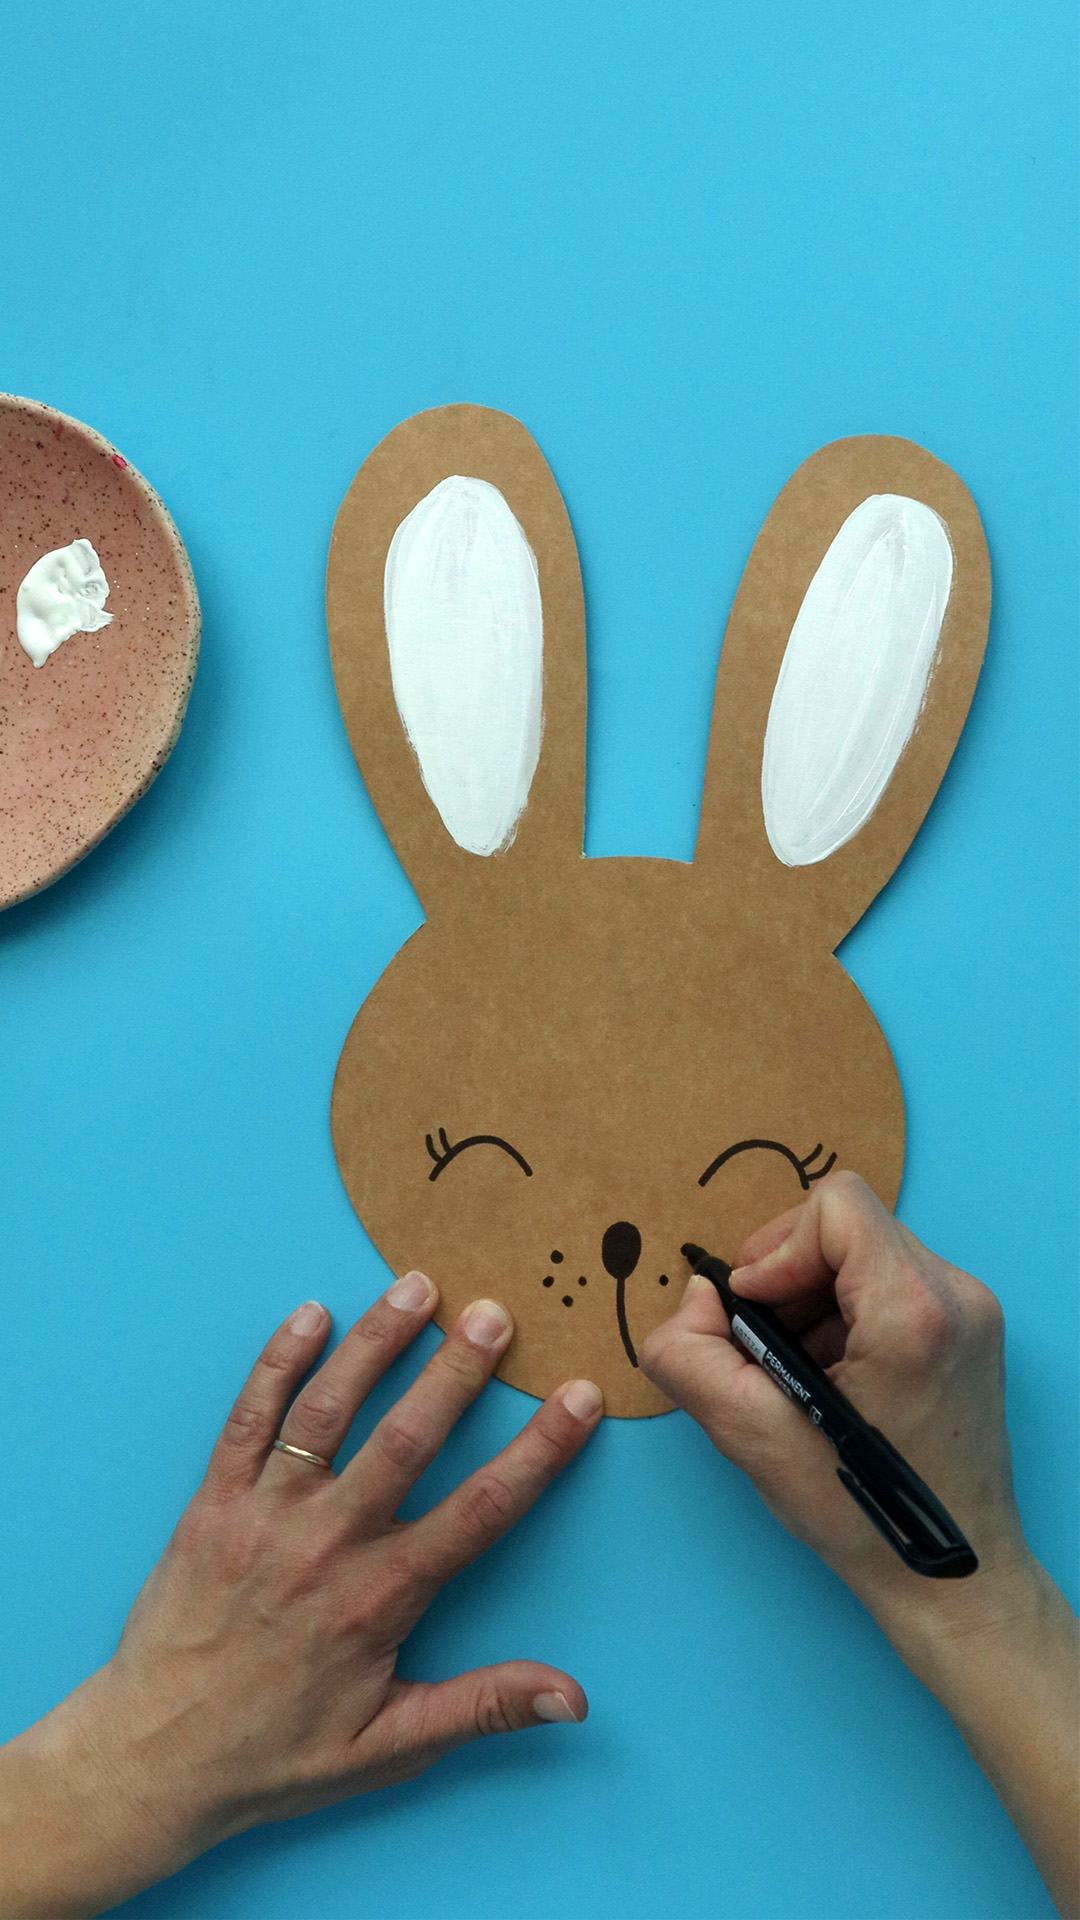
Draw two small arches on both sides of the bunny’s face. Next, draw two arched lines on the side of the closed eyes. These will be eyelashes of the bunny! You know what they say- eyelashes always add cuteness into any art!
Step 4:
Next, we are going to draw the nose of the Easter bunny! Find the center of the bunny face, and draw an oval shape using your marker! Color it black.
Step 5:
From the bottom of the black oval shape, draw an arched line down. This is a simple way to illustrate the Easter bunny’s mouth. If you like, feel free to draw a few little dots on both sides of the bunny’s face or even draw straight lines for the whiskers!
Step 6:
Next you are going to create the cheeks of the Easter bunny! Dip your round foam sponge brush into the white paint first and press it right underneath the sleepy eyes. You can always paint two circles if you don’t have the round foam brush at home or you can use wine cork to create the perfect cheeks!
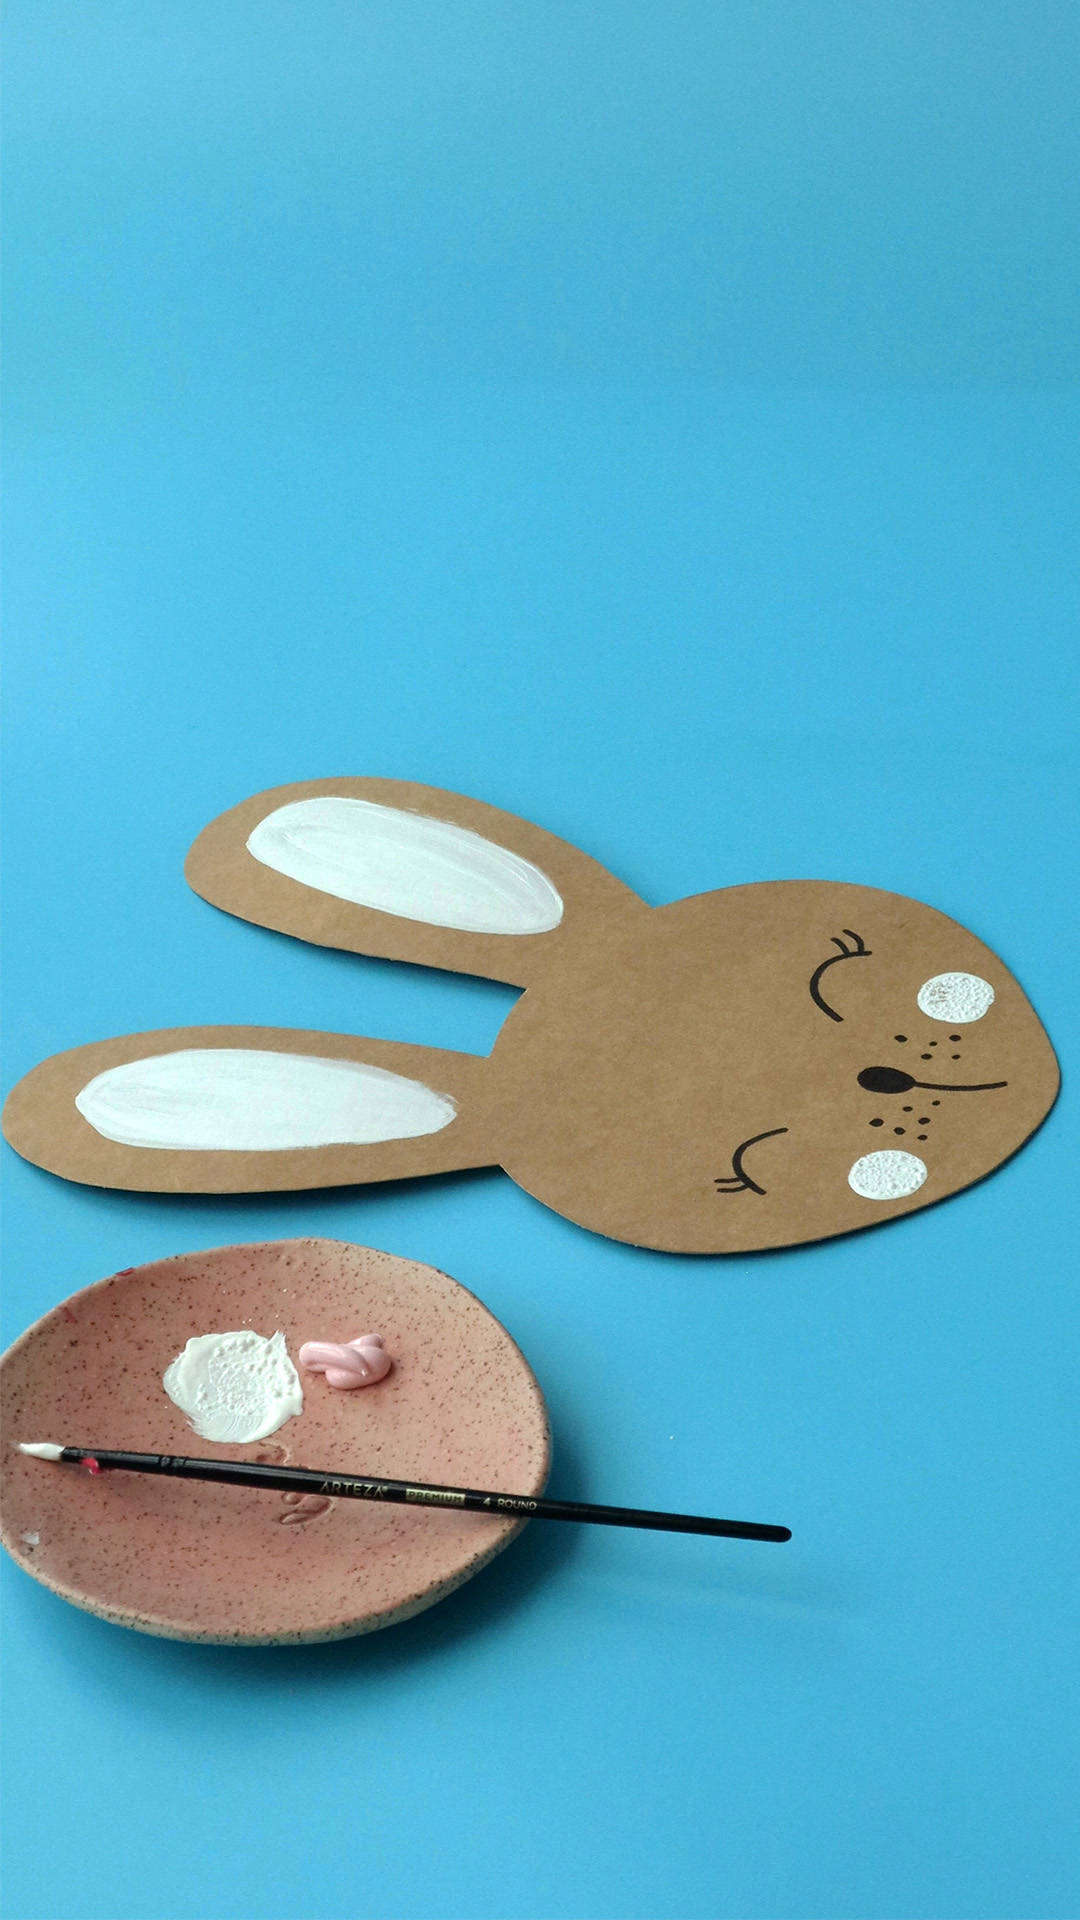
Step 7:
Repeat the same step this time, using pink or red paint. This will give the rosy cheek effect to your Easter bunny!
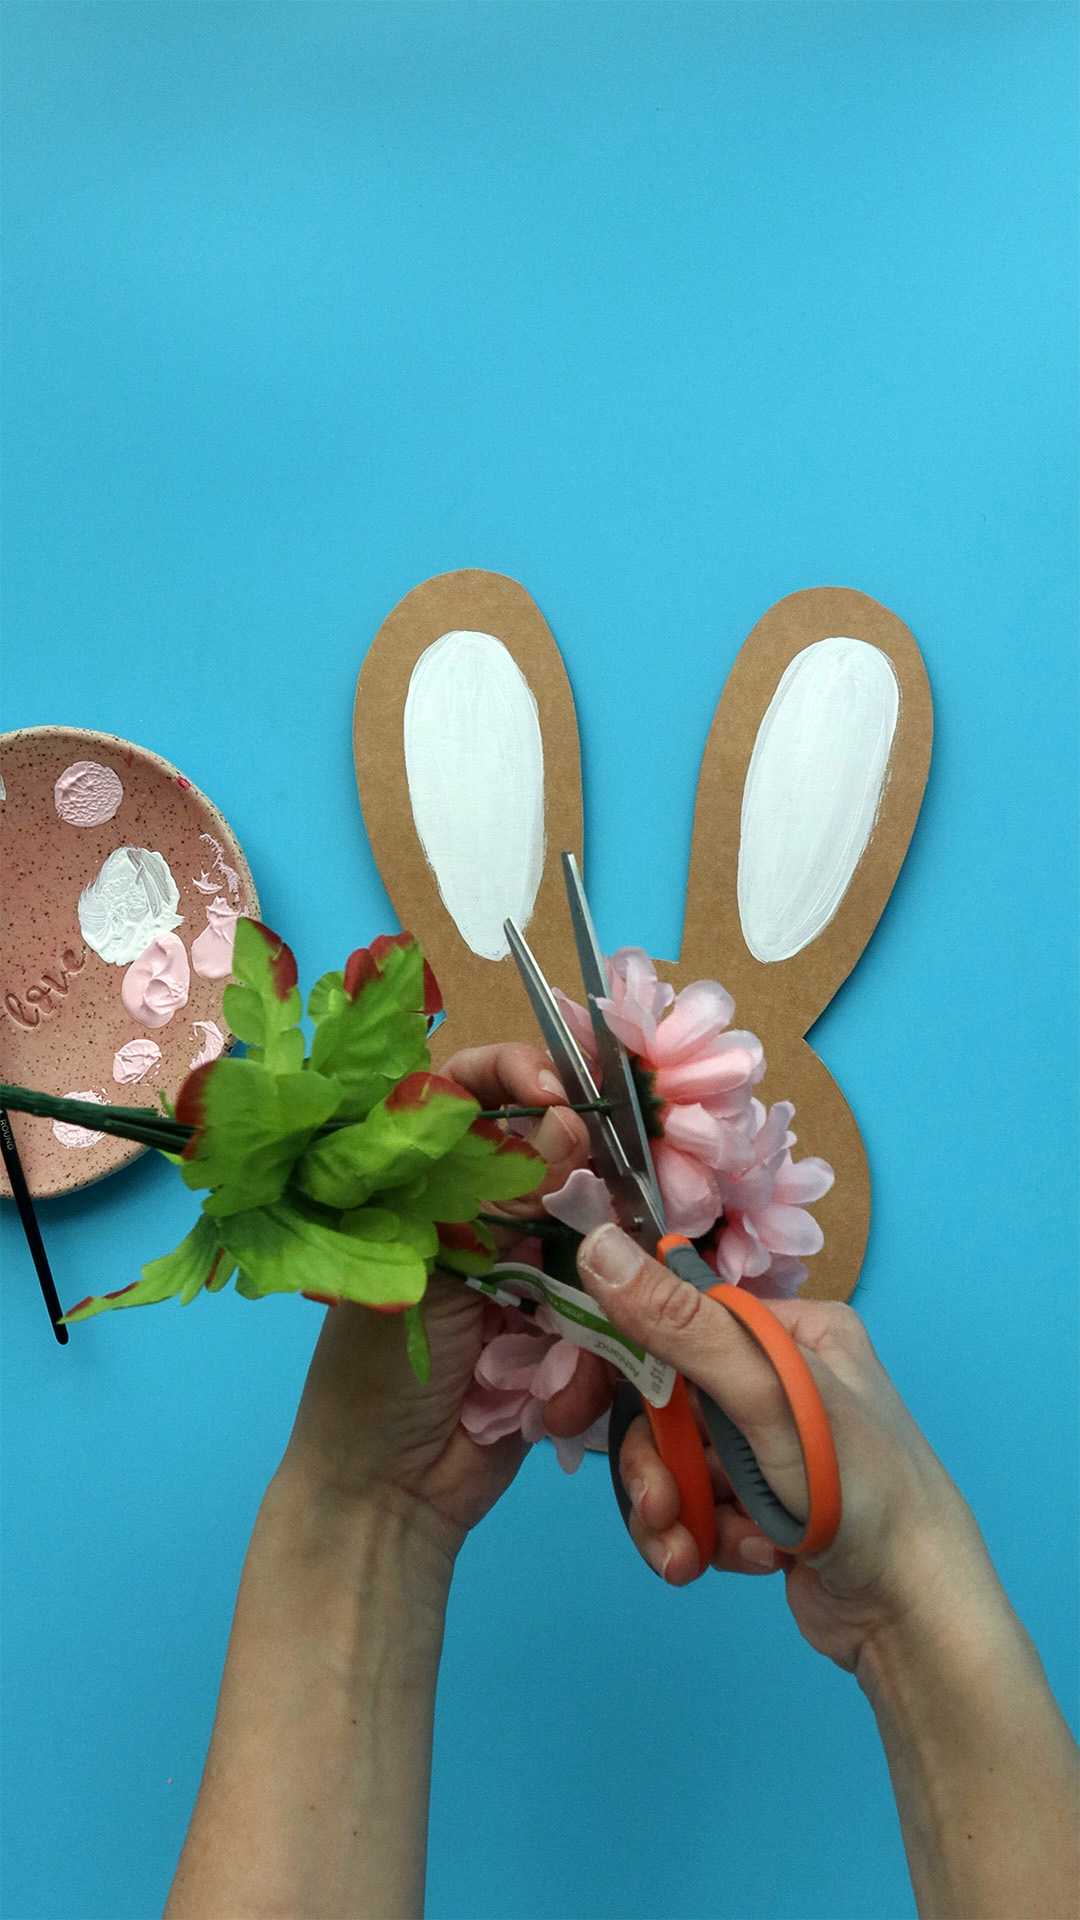
Step 8:
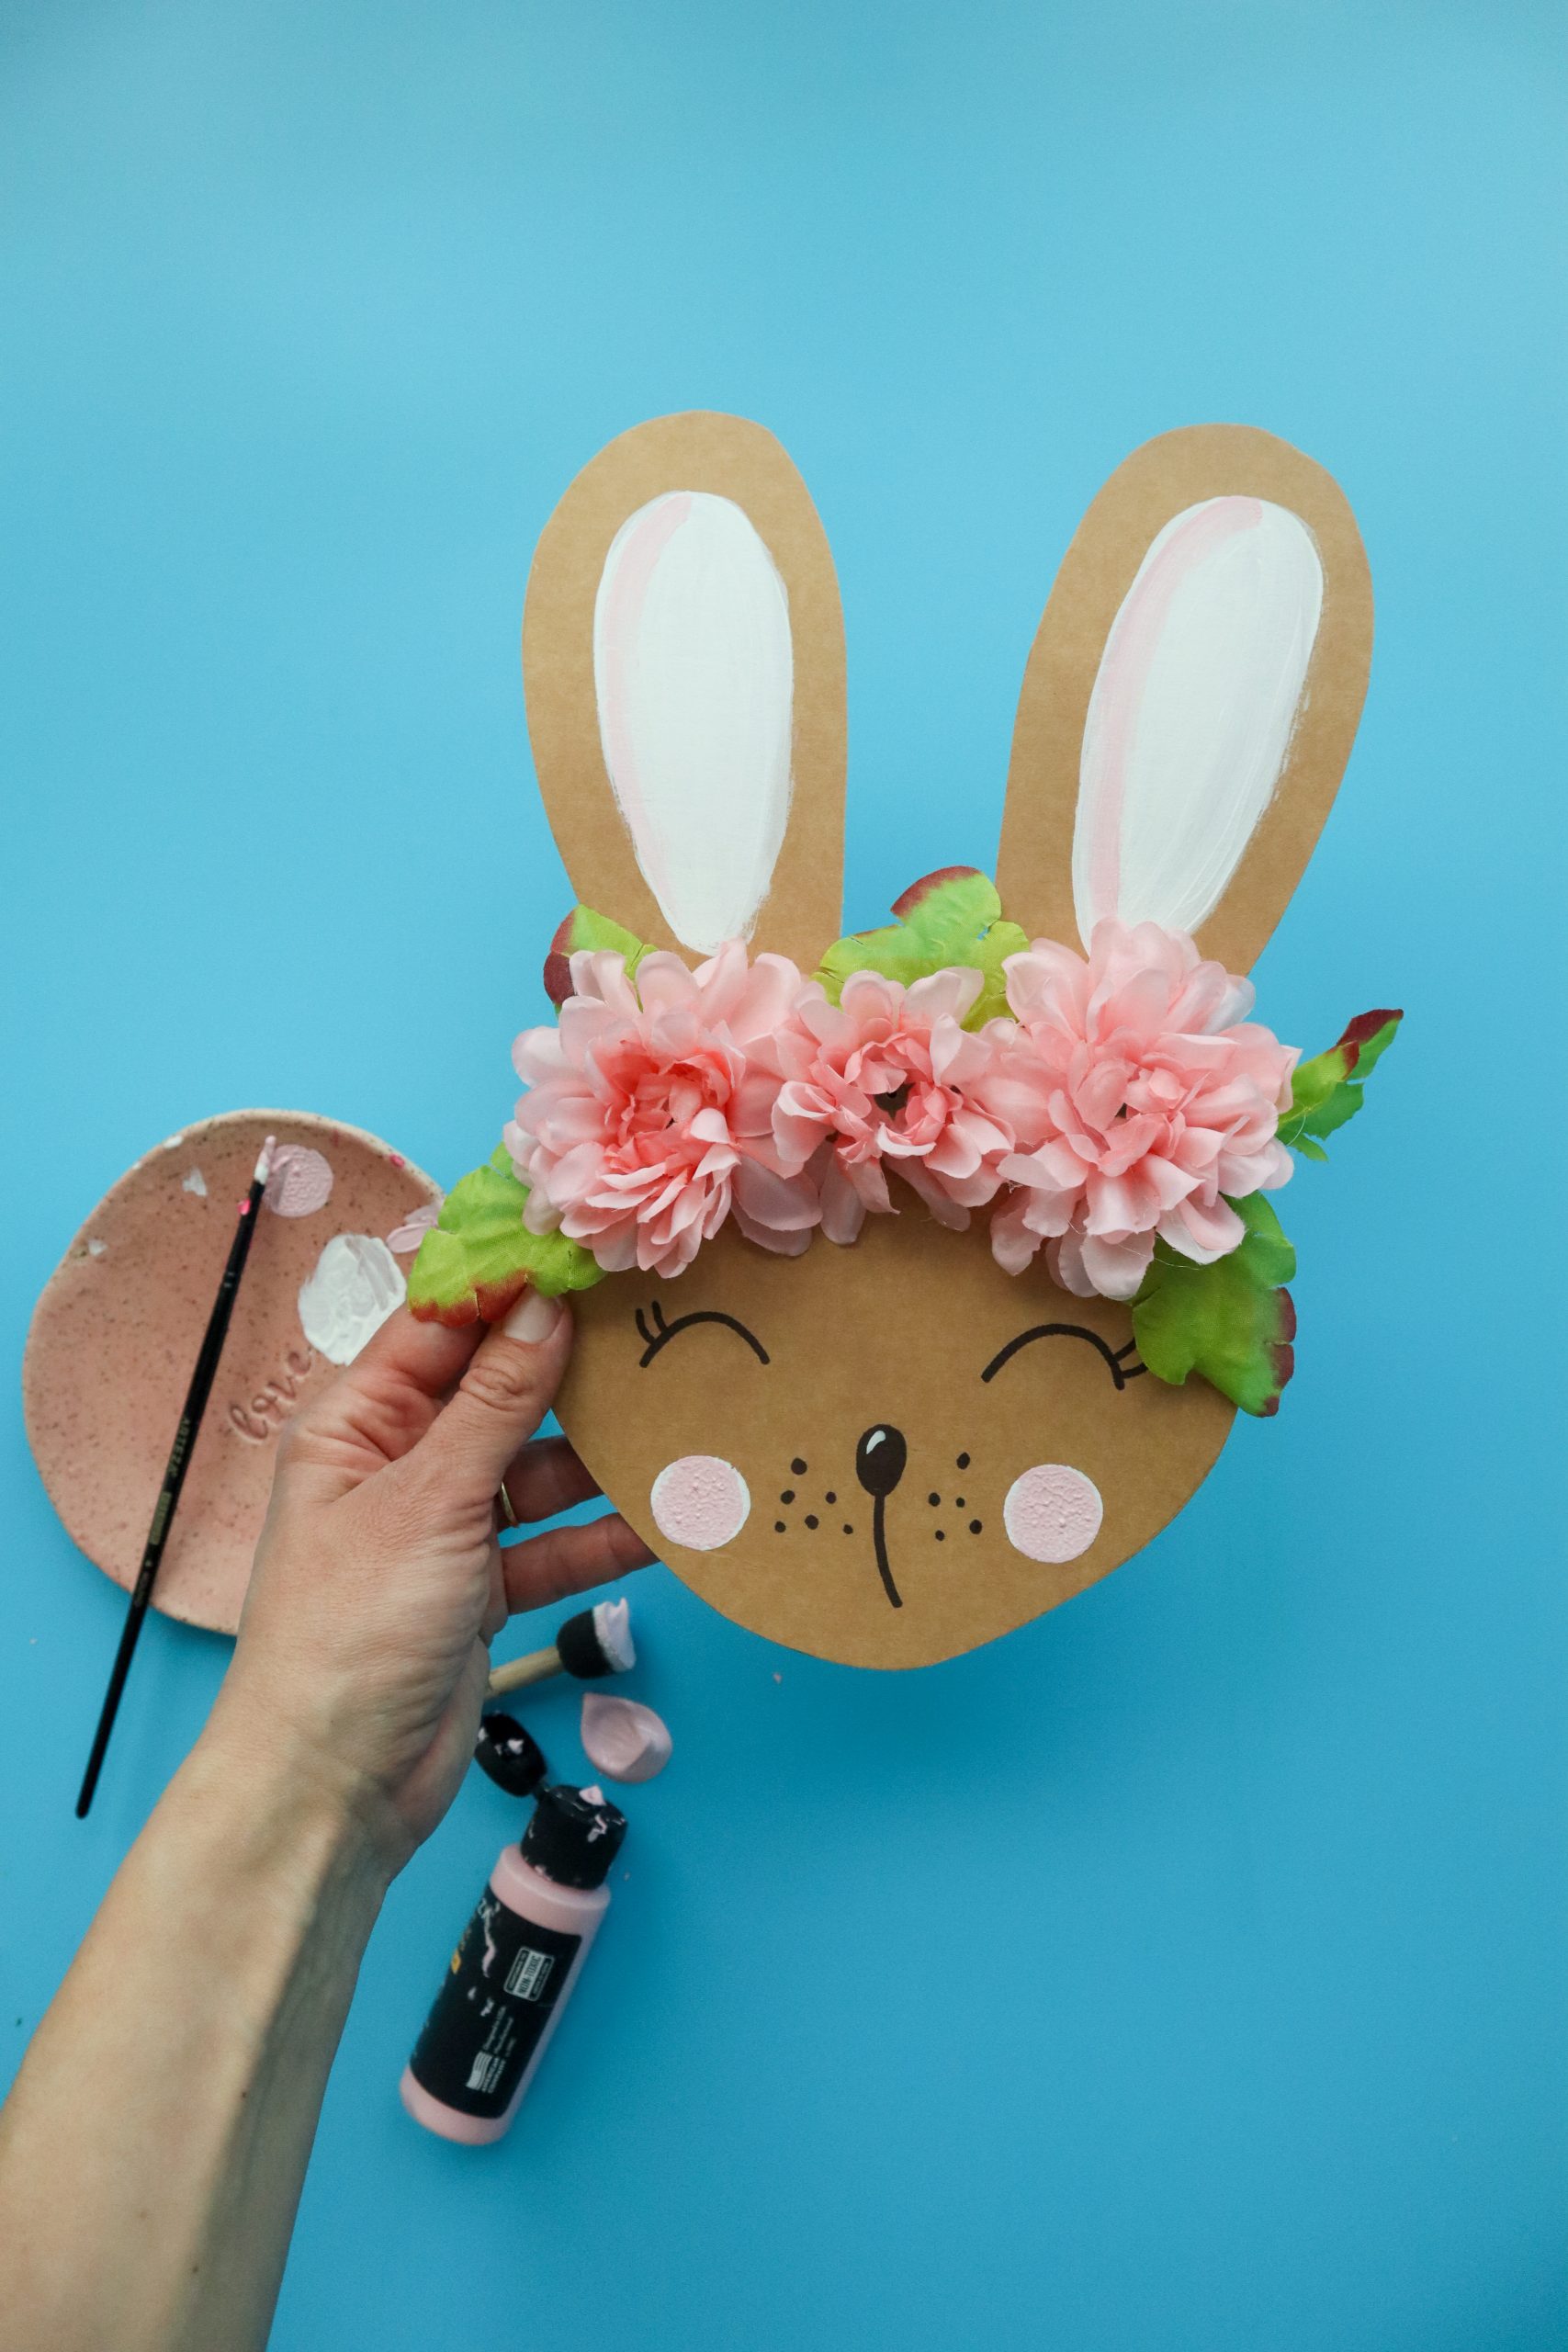
Find your flowers because it’s time to create a flower crown. Separate the flowers from the stems (you want the flower base to be as flat as possible) and cut a few leaves as well. To create the flower crown, we used three flowers and five leaves. You can add as many as you like.
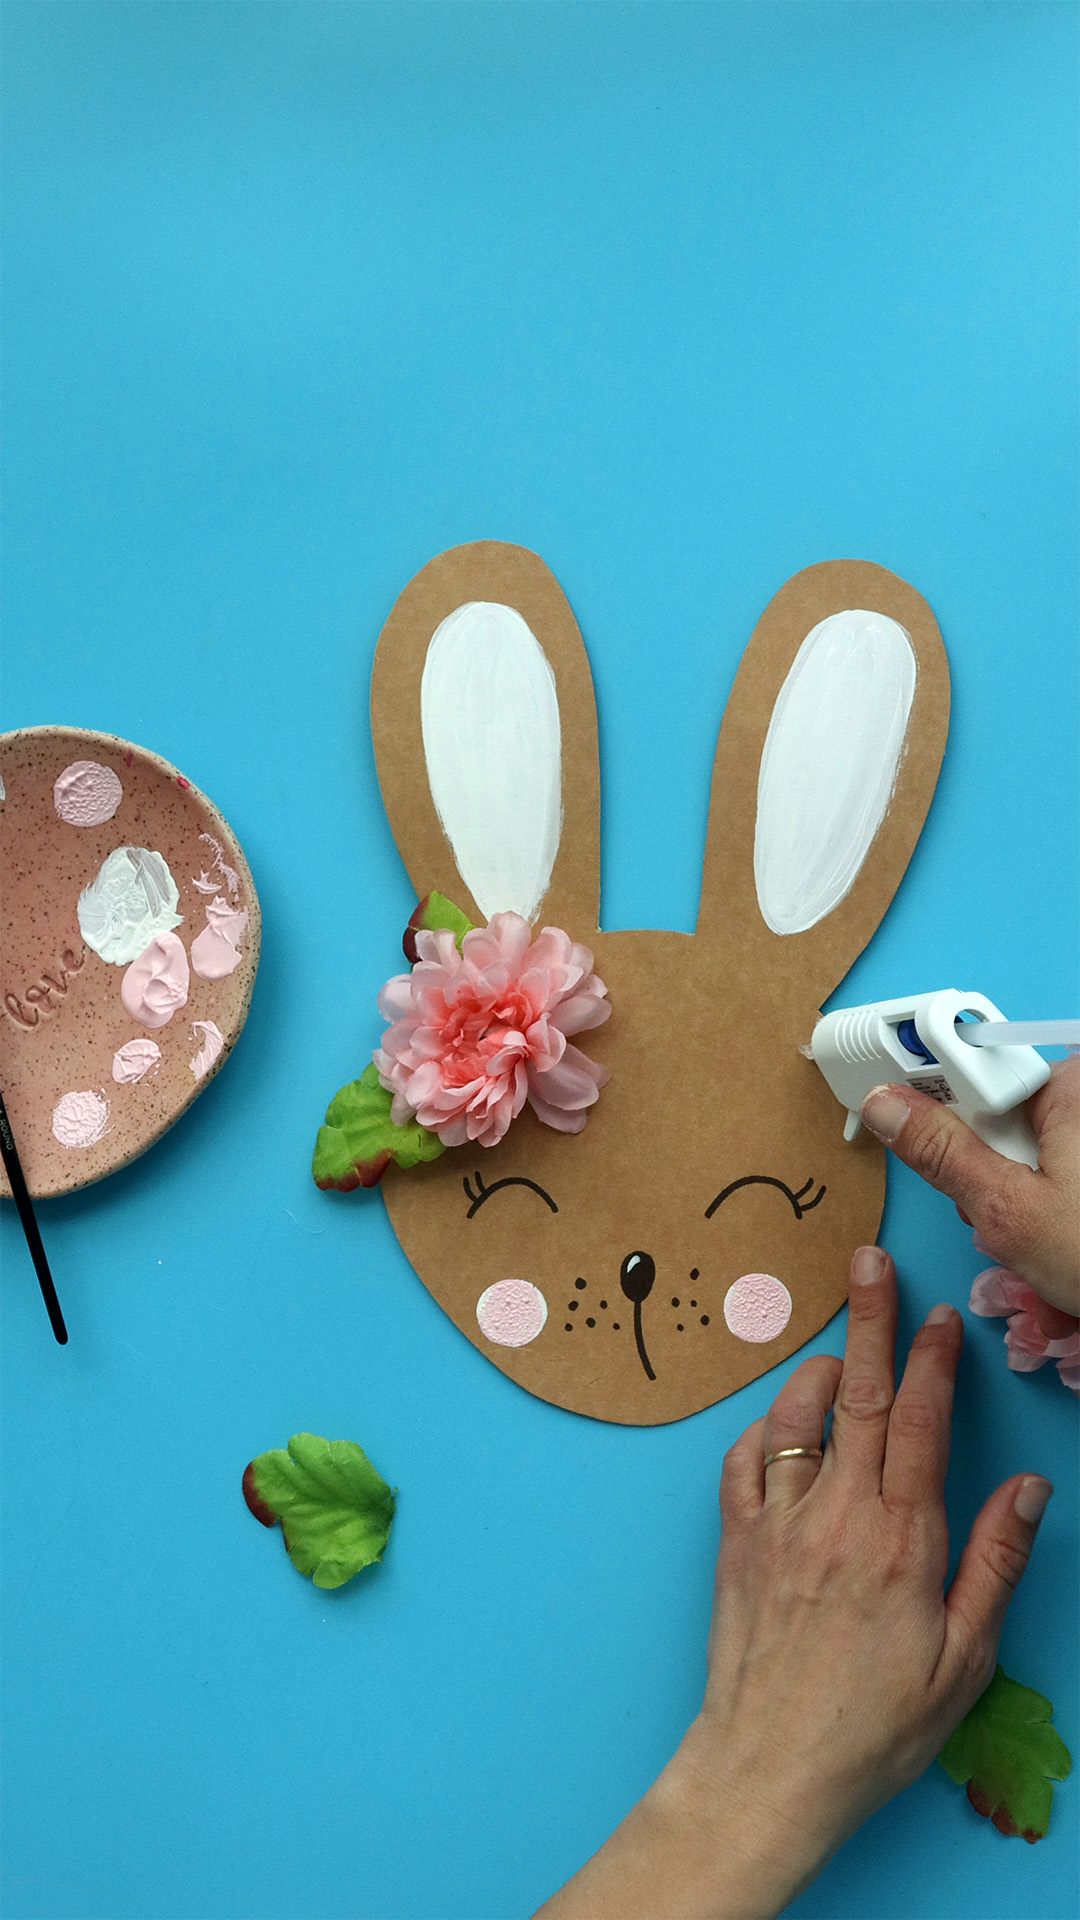
Step 9:
Turn on your hot glue and wait for the silicon to get hot. Once your hot glue is ready, apply a little bit of the glue on top of the Easter bunny’s head and press leaves on top of it. Be careful while working with the hot glue. It will be hot! Next, squeeze a little bit more glue and press the flower. Keep going until you are happy with the flower crown design.
Step 10:
And just like that you created your very own recycled Easter Bunny Craft with a blooming crown! Display your art work for everyone to enjoy!
Happy Crafting!
For more tutorials & art classes check out Lulumake’s Youtube channel!


